phx paver ppp logo hdr
Weather Effects on Paver Condition: Essential Maintenance Tips
When you think about maintaining your driveway, did you know that the weather could be your worst enemy? From torrential rain to scorching heat and icy winters, various climate conditions can seriously affect the appearance and durability of your pavers. It’s not just about how they look; ignoring these factors can lead to cracking, discoloration, and costly repairs. After putting so much effort into installing those beautiful pavers, it’s crucial to understand how weather affects them to keep them in top shape for years to come. So, let’s dive into the ways different weather elements influence your paver condition and how you can protect your investment. Weather has a significant impact on driveway pavers, with factors such as rain, heat, cold, and sun contributing to issues like cracking, discoloration, and uneven surfaces. Proper installation, material selection, and regular maintenance—such as sealing—can help mitigate these weather-related effects and extend the life of your pavers. Weathered patio pavers

Weather Elements Impacting Pavers

Your pavers face constant exposure to various elements that can impact their condition. Rain, heat, and cold are the main culprits affecting not only their appearance but also their longevity. Ignoring these factors can lead to costly repairs and deterioration over time, so awareness is key.

Rain Exposure and Water Accumulation

Rain can infiltrate through the joints into the sublayer, causing water to build up beneath the pavers. When this moisture remains trapped, it leads to shifting and uneven surfaces that may require extensive repairs. For those with natural stone pavers like travertine, the risks are heightened. If proper drainage isn't established during installation, you may find yourself with an expensive headache down the line.
To prevent such issues from arising, it’s crucial to choose eco-friendly materials and ensure professional installation is conducted with appropriate drainage measures in place. This minor investment at the start can save significant costs later on due to water damage.

UV Rays and Extreme Heat

Moving on to the king of sunny days: while we all love a little sunshine, UV rays can wreak havoc on your pavers! Over time, these rays contribute to color fading, making surfaces appear dull and lifeless. Even more concerning is how extreme heat can cause paver materials to expand—if this expansion isn't adequately controlled, cracks or warps could develop. Therefore, choosing UV-resistant sealants for your pavers becomes imperative. Not only does this create a barrier against harmful sun exposure, but it also helps maintain your pavers' vibrant appearance while enhancing structural integrity. Regular sealing ensures your driveway looks fantastic through every season!

Freezing and Thawing Cycles

In colder climates, nothing illustrates the struggle quite like the freeze-thaw cycle. This process occurs when water seeps into the joints of your pavers. As temperatures drop, that water freezes and expands; this forces cracks to form and causes heaving in the surface, making your once smooth driveway uneven.
Particularly for materials like travertine, improper installation lays a trap for water infiltration that can lead to costly repairs over time. It’s important to opt for permeable pavers that allow water to drain effectively and minimize freeze-thaw damage. The simple choice of interlocking driveway tiles can provide flexibility, reducing the risk of cracks and ensuring a strong foundation.
Recognizing these weather-related challenges empowers homeowners to make informed decisions regarding maintenance and material selections. This understanding will greatly influence how effectively your paving withstands environmental stresses as we transition into examining specific physical impacts caused by these elements.

Physical Damage from Weather

Weather can have a significant impact on driveway pavers, leading to visible damage that demands immediate attention. Understanding these risks enables homeowners to take preventative measures before minor issues develop into costly repairs.

Shifting and Settling

When heavy rain permeates the ground beneath your pavers, it can lead to instability. This manifests as shifting and settling, resulting in uneven surfaces that might be unsightly and hazardous. If you start noticing pavers tilting or gaps forming between them, it's essential to act quickly, as this may indicate that the base requires reinforcement.
A friend experienced this firsthand when their driveway took a beating during a particularly rainy winter. After reaching out to professionals at PHX Paver, they were advised on implementing a more robust drainage system to prevent future water accumulation. This simple yet effective measure resulted in improved stability and peace of mind.

Cracking and Erosion

In colder regions, freeze-thaw cycles pose a serious threat to paver longevity. Studies reveal that nearly 30% of paver damage can be attributed to cracking from these cycles. Water seeps into gaps or porous areas within the pavers, freezes, and expands, leading to cracks once temperatures rise again. These cracks not only reduce aesthetic appeal but can worsen over time as debris accumulates in them, exacerbating erosion. To mitigate such risks, it's wise to select durable materials that withstand extreme temperature fluctuations. For example, opting for porcelain pavers or interlocking concrete units can provide enhanced durability under such stressors.

Warping from Heat

On the other end of the spectrum, high temperatures are another culprit affecting paver condition. Intense heat can cause materials like brick—and even certain types of natural stone—to warp or crack under thermal stress. This impacts not just appearance but also the structural integrity of your driveway.
Choosing pavers specifically tested for thermal expansion resistance is imperative in combating this issue effectively. Products synthesized with advanced technologies often outperform traditional materials regarding enduring high heat without warping.
Considering these potential issues—be it shifting from water intrusion, cracking from freeze-thaw cycles, or warping due to high temperatures—understanding seasonal impacts on your driveway will further enhance its longevity and performance.

Seasonal Effects on Pavers

Understanding seasonal effects is key to preserving the beauty and longevity of your pavers. Spring tends to arrive with gentle rains that can lead to water accumulation; while this moisture can be a boon for plant life, it can also contribute to mold and mildew growth on paver surfaces if not managed correctly. Therefore, this season presents an excellent opportunity for a thorough cleaning. You might want to consider using a pressure washer to blast away dirt and grime—just ensure that you follow up with proper sealing to protect against future moisture issues. As spring gives way to summer, the dynamics shift dramatically. The longer days and intense sunshine can wreak havoc on your paver's color, leading to fading that detracts from their aesthetic appeal. To combat this damage, it's wise to apply UV-resistant sealants during warmer months. These sealants provide a protective layer, minimizing sun damage while ensuring the colors of your pavers remain vibrant. After all, no one wants their elegant outdoor space looking dull in the golden summer light! Just as the temperature dictates our activities, autumn’s arrival introduces new challenges for your pavers. Fall brings with it a carpet of colorful leaves and organic debris that can not only clog drains but can also stain your pavers if left unchecked. This is the perfect time for regular sweeping and cleaning to prevent stains from taking hold—but that’s not all. If you have trees near your patio or driveway, consider a higher frequency of cleanings during this season to avoid the buildup of decaying matter that could introduce unwanted elements like moss or fungi into the mix. Then comes winter, a season that can be particularly unforgiving for outdoor elements. The freeze-thaw cycles characteristic of winter are notorious for causing cracks in rigid materials. Inspecting your pavers before winter sets in is crucial to catch any weaknesses early on. Look for signs such as tiny fissures or uneven settling that may spell trouble. Additionally, always use de-icing products that are safe for pavers when attempting to combat ice build-up; some salts can cause irreversible damage over time. By being aware of these seasonal influences and being proactive through maintenance routines, you empower yourself to better protect your outdoor surfaces as nature continues its cycle throughout the year.

Tips for Minimizing Weather Damage
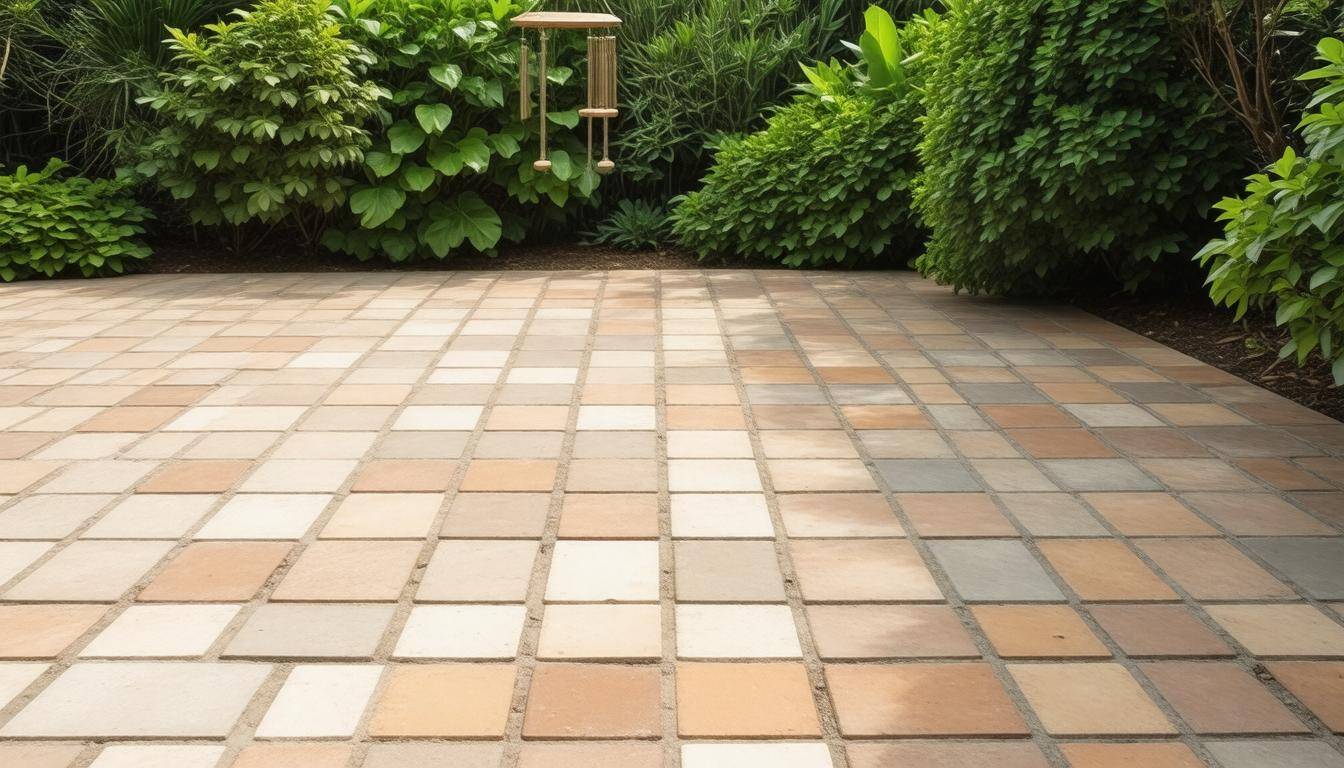
Well-maintained paver patio Fortunately, there are several proactive strategies homeowners can adopt to minimize the impact of weather on driveway pavers, ensuring both aesthetic appeal and structural integrity over time.

Sealing Your Pavers

One of the best defenses against weather-related damage is applying a professional-grade sealant designed for your specific type of paver. A good sealant acts like an invisible shield, providing a barrier against rain, harsh UV rays, and temperature fluctuations while also preventing stains and moisture infiltration. By opting for a sealant suited to your local climate, you ensure that it responds effectively to the unique challenges your pavers face. For instance, if you live in an area with heavy rainfall or snowfall, choose a water-repellent sealant that seals off moisture entry points. Regular resealing every one to three years can vastly prolong the life of your pavers.

Ensuring Proper Drainage

Effective drainage systems can make or break driveway longevity. If water pools instead of draining away properly, it begins to seep into the layers beneath your pavers, leading to shifting and cracking over time. Imagine a poorly drained yard after a heavy rain—water collects around your drive instead of flowing away. Professionals at PHX Paver can design drainage solutions tailored specifically for your property. This might include installing permeable pavers that allow water to flow through them or creating slopes that direct moisture away from heavy-use areas. Such preventative measures will help keep your driveway intact during heavy rains or thawing periods when melting snow might create problems.

Regular Inspections

Just as regular check-ups are vital for our health, routine inspections are crucial for the well-being of your driveway pavers. By inspecting your pavers each season, you can catch small issues—such as cracks or shifted stones—before they evolve into more complex problems requiring extensive repairs. An astute inspection involves looking for visible damage while examining joint sand levels and ensuring no debris is trapping moisture against the surface. Keeping an eye out and addressing any minor issues promptly enhances both the longevity and appearance of the pavers. By incorporating these essential strategies into your maintenance routine, you'll set the stage for more effective care practices that can further extend the life of your pavers. Understanding how to maintain these surfaces is key to ensuring their durability over time.

Maintenance Practices for Longevity

Proper maintenance is indeed the key to prolonging the life of your pavers, and it begins with routine cleaning. Regular cleaning helps to prevent the accumulation of organic materials such as leaves, moss, and algae, which can cause stains and ultimately lead to erosion. Imagine your driveway after a heavy rain—suddenly, you might find unsightly green patches or dark spots among the stones. By using a broom or a leaf blower regularly to clear away debris, you can maintain that fresh, appealing look while ensuring optimal drainage. This simple act creates a barrier against future growth that could mar the surface and diminish its integrity. Now that we've established the need for routine cleaning, let’s talk about another essential practice: applying sealants. Make it a habit to reapply sealants according to the manufacturer's recommendations, typically every two to three years. Sealants act as a protective layer, safeguarding your pavers from water damage while preventing stains from moisture and dirt. They also help keep colors vibrant, giving your driveway or patio a look that lasts through harsh weather. The process typically involves thorough cleaning before application; after all, nothing ruins good sealant like dirt trapped underneath! When done correctly, homeowners often find that sealed pavers are easier to clean later on and retain their original luster for a much longer time. While DIY care is important, there’s no substitute for expert assistance in professional maintenance services. Hiring professionals ensures that comprehensive paver maintenance is executed thoroughly and correctly. For instance, specialized services like those offered by Phoenix Paver not only understand the intricacies involved but also utilize industry-grade products tailored specifically for conditions unique to your area. Whether it's ensuring proper drainage during installation or applying high-quality sealants effectively, expert help can save you both time and potential headaches down the road. They have access to equipment and knowledge that guarantees every aspect of your paver maintenance is attended to precisely. In truth, taking care of your driveway or patio isn’t just about aesthetics—it’s about preserving an investment that enhances your property value. Keeping up with these maintenance practices ensures longevity and durability in the face of changing weather conditions while enhancing safety. Understanding maintenance practices lays a strong foundation for exploring how different materials fare against varying climates. It’s crucial to align material choices with environmental demands to maximize both durability and aesthetic appeal.

Material Choices for Different Climates
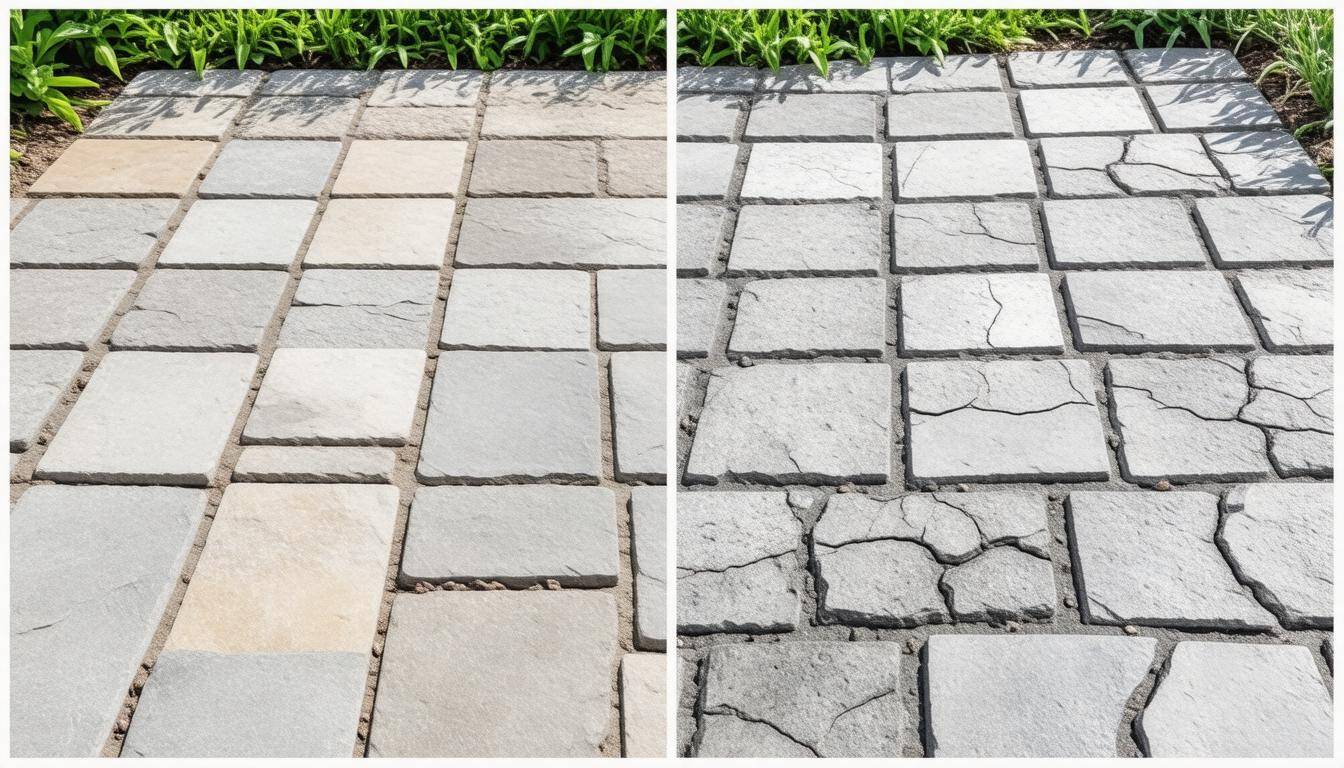
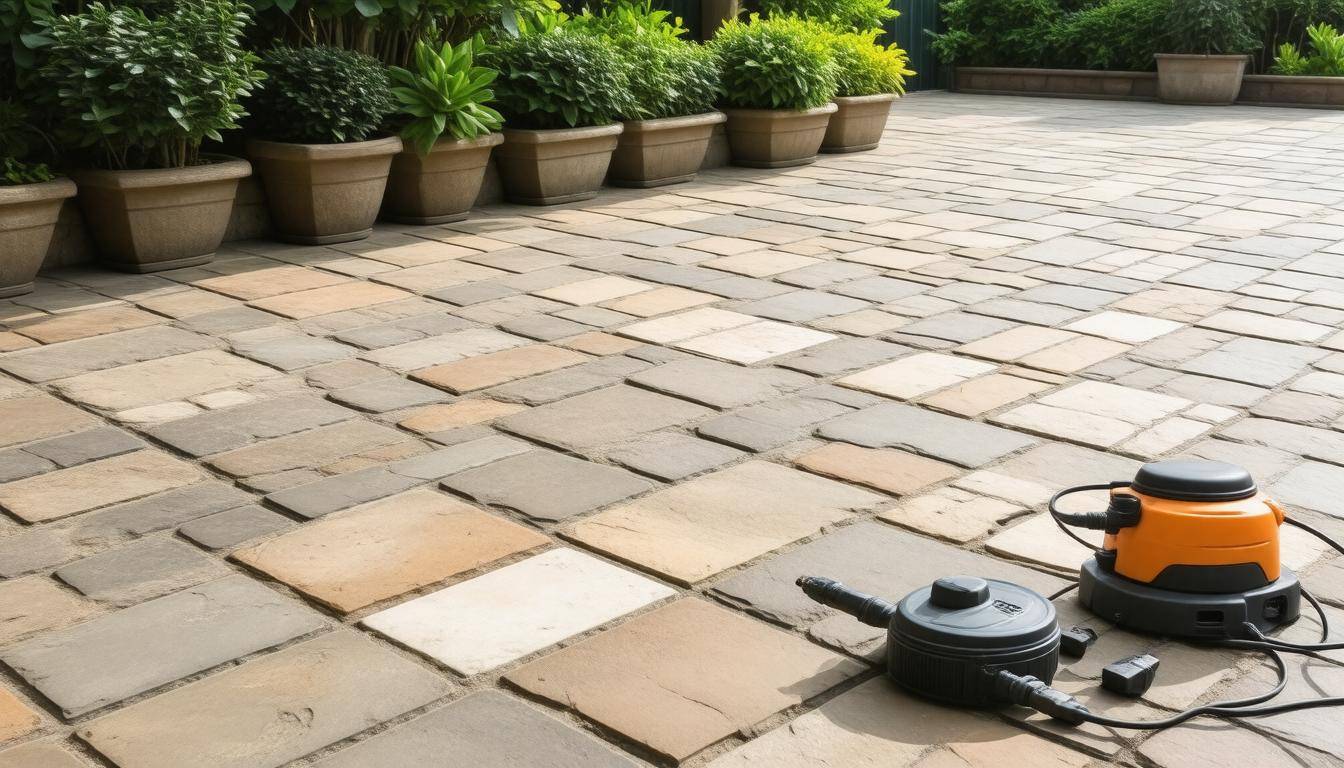
Paver material comparison Selecting the appropriate paver material is crucial to ensuring durability and aesthetics throughout changing seasons. In cold climates, permeable pavers shine due to their ability to allow water to seep through, significantly reducing ice formation on surfaces during winter. Using interlocking designs enhances stability, which is especially important during freeze-thaw cycles. Robust options like concrete or dense natural stones help mitigate the stress that freezing temperatures impose. Their resilience means they won't crack easily under the weight of snow or through temperature oscillations, making them wise choices for homeowners in snowy regions. Transitioning to warmer conditions brings another set of challenges. In hot climates, selecting materials that withstand extreme heat without wear is essential. Here, options such as concrete and porcelain driveway pavers stand out. These materials are known for their thermal resistance, effectively handling high temperatures while minimizing thermal expansion that can warp or weaken lesser products. For those designing outdoor spaces in sun-soaked areas, investing in these reliable materials pays dividends by maintaining both the integrity and aesthetic appeal of hardscapes. Conversely, what happens when humidity levels rise? In regions characterized by high humidity and rainfall, the risks associated with accumulated water become a leading concern for homeowners. Selecting porous materials like honed travertine elevates visual appeal and promotes better drainage. Ensuring that proper drainage systems are put in place is paramount; when water can freely pass through the pavers, it minimizes standing water that can lead to mold growth or hinder aesthetics over time. Choosing these thoughtful solutions provides immediate benefits during rainstorms while prolonging the lifespan of the entire installation.
Quick Tip

Opting for materials tailored to your regional climate directly correlates with longevity and maintenance ease, ultimately leading to a more satisfying paver experience. In summary, understanding your climate and choosing suitable materials can significantly enhance your paver's longevity and performance. Taking these factors into account will ensure a beautiful and durable outdoor space for years to come.
Read More
Maintenance Tips for Paver Patios: Essential Care and Cleaning Guide

Maintaining a paver patio isn't just about keeping up appearances; it's about preserving an outdoor sanctuary that can elevate your home. Think of your patio as an extension of your living space—one that welcomes friends for summer barbecues, serves as a peaceful retreat, and sometimes even becomes the setting for late-night stargazing. However, without proper care, this beautiful addition can quickly turn into a problematic patch of weeds and stains. Luckily, with some simple maintenance tricks and a bit of effort, you can ensure your patio remains inviting for years to come. Let's dive into essential tips to keep your outdoor oasis pristine and functional!

To maintain your paver patio effectively, it is essential to perform regular cleaning to prevent dirt buildup and to remove any weeds or moss that may develop. Additionally, applying polymeric sand between the joints can help maintain stability and prevent shifting, while power washing every few years will refresh the surface without damaging it.

Well-kept paver patio

Essential Maintenance for Paver Patios

Maintaining paver patios effectively requires consistent effort but yields long-term benefits that are hard to overlook. Many homeowners often underestimate the impact of simple routine checks and regular care. For instance, weekly sweeping not only removes debris, like leaves or twigs but also prevents stains from taking hold of the surface. The longer those bits are allowed to linger, the more likely they’ll leave marks or promote moss growth. I recall chatting with a neighbor who dedicated just ten minutes each week to this task and they were amazed at how much less time they spent deep cleaning as a result.

Weekly Checks and Cleaning

Taking the time to sweep the patio surface regularly can keep it in pristine condition. Utilizing a push broom works wonders to gather dirt and fallen leaves; it's an incredibly simple yet effective first line of defense against grime. As you go along, try to inspect for any signs of weeds beginning to squirm their way between pavers. Catching them early means less hassle down the road when they grow larger and start to disrupt the integrity of the stones. Furthermore, a diligent individual on Reddit shared how implementing regular sweeping reduced their overall cleaning time significantly, making the process nearly effortless.

But sweeping alone won’t suffice; you’ll also want to dedicate effort toward seasonal deep cleaning.

Seasonal Deep Cleaning

Each season calls for a thorough cleaning session. During this time, using a standard hose or even a low-pressure power washer can eliminate built-up dirt and grime affecting your patio's aesthetic charm. It's essential to avoid excessive pressure, which might dislodge pavers or erode joint sand filling, so gentle settings are key here. One satisfied user of our services named Jamie remarked, "Seasonal deep cleaning preserved the vibrant color of my pavers for years!" A well-loved patio naturally becomes an inviting space for gatherings and relaxation when it's kept looking its best.

While cleaning is certainly crucial, maintenance extends beyond mere aesthetics into proactive care.

Inspections and Repairs

Regular inspections play an equally vital role in maintaining your paver patio’s longevity. It's important to walk through your outdoor space every few weeks to check for visible signs of damage such as cracks or chips in the pavers. An ounce of prevention is worth a pound of cure. If you notice these issues immediately and address them promptly—perhaps by refilling joints with polymeric sand or swapping out damaged stones—you can avert larger repairs that could be both costly and time-consuming later on. By staying vigilant and addressing minor concerns swiftly, you’ll not only save money but also ensure your patio remains safe and beautiful for years to come.

Building upon these essential practices will lead us toward exploring specific methods that maximize cleanliness and prolong your patio's lifespan.

Effective Cleaning Techniques

Proper cleaning techniques can significantly enhance the lifespan and appearance of your paver patio. Regular attention not only keeps your outdoor space inviting but also protects it from long-term wear and structural issues. The first step in this maintenance routine involves something simple yet effective: dry sweeping. This technique, which should ideally be performed weekly, requires just a push broom and a little elbow grease. By regularly sweeping away leaves, dirt, and other debris, you prevent buildup that might lead to stains or impede drainage.

A clean surface allows the pavers to breathe, reducing the chances of moss or algae growth, thus promoting overall health for your patio.

Following dry sweeping, it’s important to incorporate deeper cleaning methods into your seasonal routine.

Low-Pressure Washing

The next key method is low-pressure washing, which should be done at least seasonally. Using a garden hose with a low-pressure attachment or a gentle pressure washer can help wash away the accumulated dirt and grime without causing damage. Aim for a pressure setting between 2,500 to 3,000 PSI for optimal results. It’s also important to angle the nozzle correctly—about 30 degrees works well—to avoid blasting dirt into the joints between pavers. This gentle method revitalizes the appearance of the pavers by restoring their original color while preventing erosion of the joint sand.

Spot Cleaning Stains

Life happens; spills are inevitable on patios where friends gather for barbecues and children play. For these unfortunate occurrences, spot cleaning is a must. Addressing specific stains as they happen will prevent them from becoming permanent eyesores. A tried-and-true mixture of dish soap and warm water applied with a stiff-bristled brush works wonders for most common stains. For tougher marks like oil or rust, sprinkling baking soda on the stain before scrubbing with the soapy mixture can absorb excess oil while freshening up the area.

Remember when those holiday lights went up? They looked great until someone knocked over that drink—here’s your chance to shine!

Consistency in these cleaning efforts not only preserves aesthetics but also maintains functional integrity, ensuring that guests can walk freely without slipping on moss-covered areas.

It’s important to take a proactive approach rather than wait for dirt and stains to accumulate. If regular maintenance prompts you to clean every couple of months instead of letting problems build up seasonally, you’ll find the process less daunting and your patio looking pristine year-round.

Here’s a quick overview of effective techniques:

  1. Dry Sweep Weekly: Keep debris at bay.
  2. Low-Pressure Wash Seasonally: Revitalize your pavers.
  3. Spot Clean Immediately: Tackling stains promptly works best.

Adopting these techniques into your maintenance routine not only preserves beauty but also ensures your outdoor area remains functional and inviting moving forward.

Handling Stains and Dirt

Cleaning paver patio

Stains on paver patios are as common as a morning cup of coffee; they just happen! The key is to address them promptly, as allowing stains to linger affects the appearance of your patio and can undermine its structural integrity over time. The good news? Most stains have straightforward solutions that require minimal effort.

Common Stains and Solutions

  • Oil Stains: These pesky remnants can accumulate from grilling or leaky vehicles. To tackle them, use a degreaser or a mixture of dish soap and water. Apply your chosen cleaner directly onto the stain, then scrub gently with a plastic brush. This process helps lift the oil away without damaging the pavers.

  • Rust Stains: Often appearing from metal objects left in contact with the surface for too long, rust stains can be stubborn. Combat them effectively by opting for lemon juice or vinegar. Use these acidic solutions sparingly to avoid etching the stone surfaces.

  • Food and Drink Stains: Make way for a baking soda paste! Mix equal parts baking soda and water, apply this concoction to the stain, and let it sit for about ten minutes. Afterward, scrub gently before rinsing it off. This method works wonders on spilled drinks and food residues alike.

A homeowner once mentioned, "I spilled oil and within minutes, used dish soap, and it disappeared without a trace!" Their experience highlights how quick action truly makes all the difference.

Beyond dealing with stains, another persistent issue many patio owners face is weed growth. Unwanted vegetation can slip through gaps between pavers and wreak havoc on their aesthetic and stability.

Maintaining your paver patio doesn't stop at stain management; it's essential to keep an eye out for those intruding weeds. Frequent monitoring allows you to nip those nuisances in the bud—literally! Regularly clearing away debris and ensuring appropriate drainage will discourage weed growth while promoting the overall health of your outdoor space. Addressing issues preemptively saves time and effort down the line!

Preventing Weeds and Grass Growth

Weeds and grass can turn a pristine paver patio into an unsightly mess if left unchecked. These persistent plants spoil the aesthetic appeal and can lead to structural issues over time, as their roots may disrupt the stability of the pavers. Thankfully, with proactive measures, you can maintain a clean and inviting outdoor space without breaking a sweat.

Using Polymeric Sand

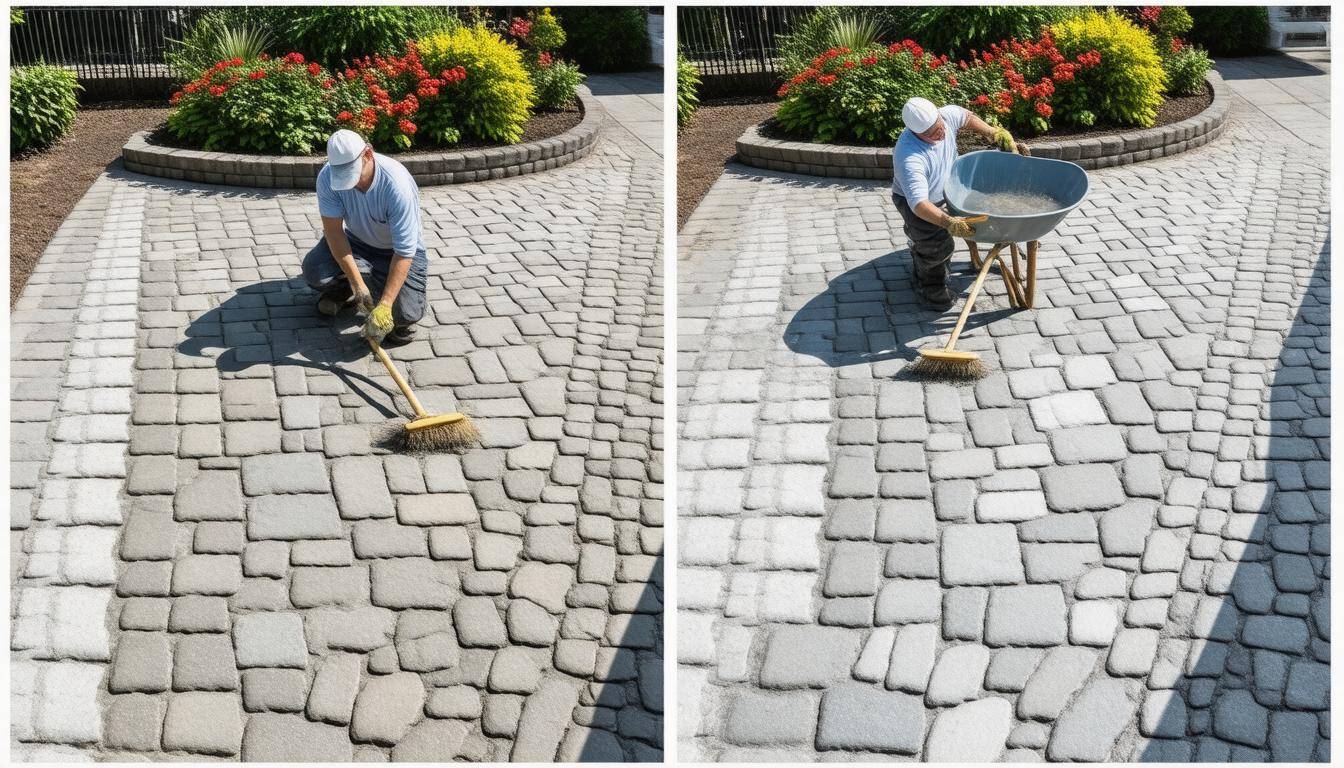
One of the most effective methods for preventing weed growth is by applying polymeric sand in between the joints of your pavers. Unlike traditional sand, polymeric sand contains additives that help it harden when wet. This unique property creates a solid barrier that effectively blocks weed seeds from taking root. Many customers have reported an impressive reduction—up to 90%—in weed growth after switching to polymeric sand, emphasizing its effectiveness in maintaining that clean look.

“Using polymeric sand was a game changer for my patio! The weeds barely stand a chance now.” (A satisfied customer)

Regular Edge Maintenance

It’s equally important to pay attention to the edges of your paver patio. Weeds often encroach from these sides, making it necessary to trim any grass or plants growing too close. Regularly maintaining this perimeter enhances the beauty of your patio and reduces potential avenues for weeds to take hold. Think of it as giving your patio a well-defined boundary that keeps nature in check.

Herbicides for Persistent Weeds

For particularly stubborn weeds that manage to break through your defenses, using an eco-friendly herbicide may be necessary. When applying herbicides, always proceed with caution; target the weed while avoiding chemicals spilling onto your beloved pavers or nearby plants. This will ensure you’re managing weed growth effectively without harming other elements in your yard.

With these preventive measures—applying polymeric sand, maintaining edges, and judiciously using herbicides—you set yourself up for success against unwanted greenery. Now, let’s move forward to explore the next steps in maintaining the integrity of your exquisite outdoor space.

Resealing Paver Patios

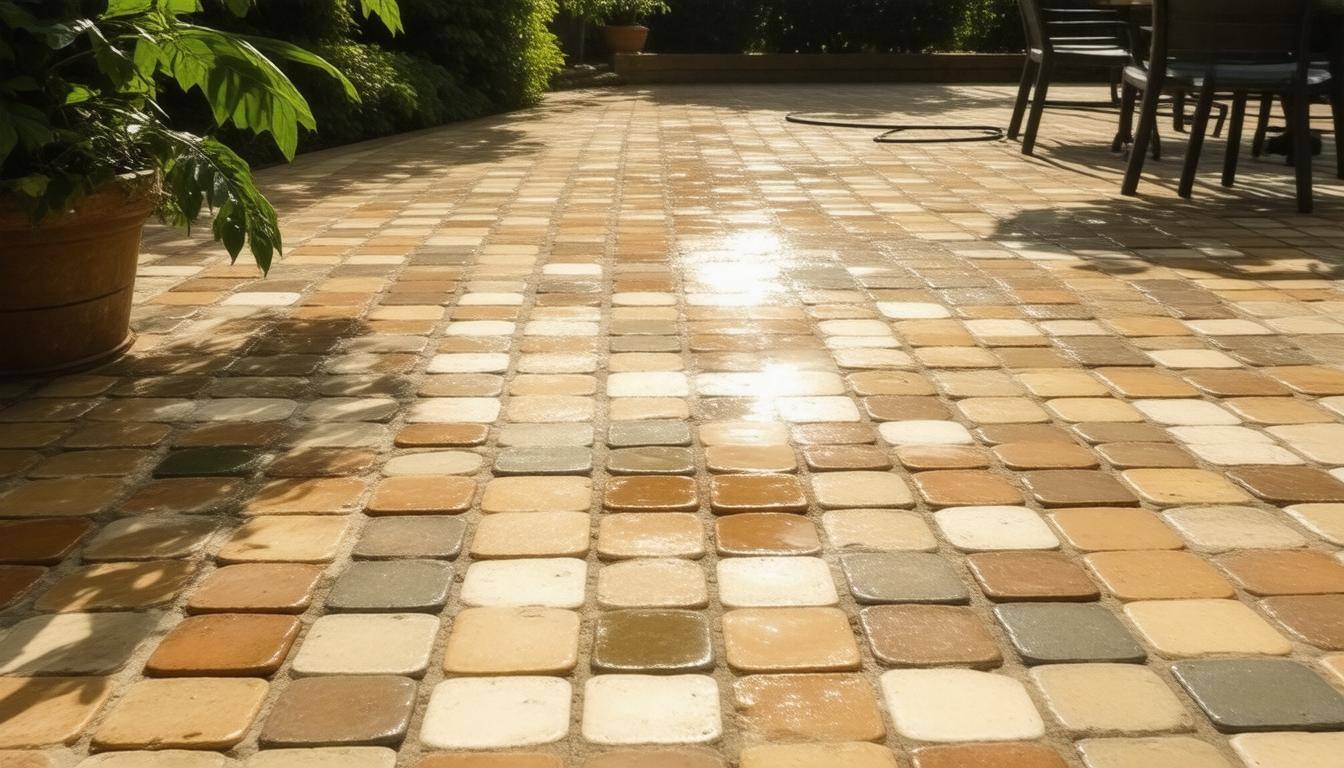
Freshly sealed paver patio

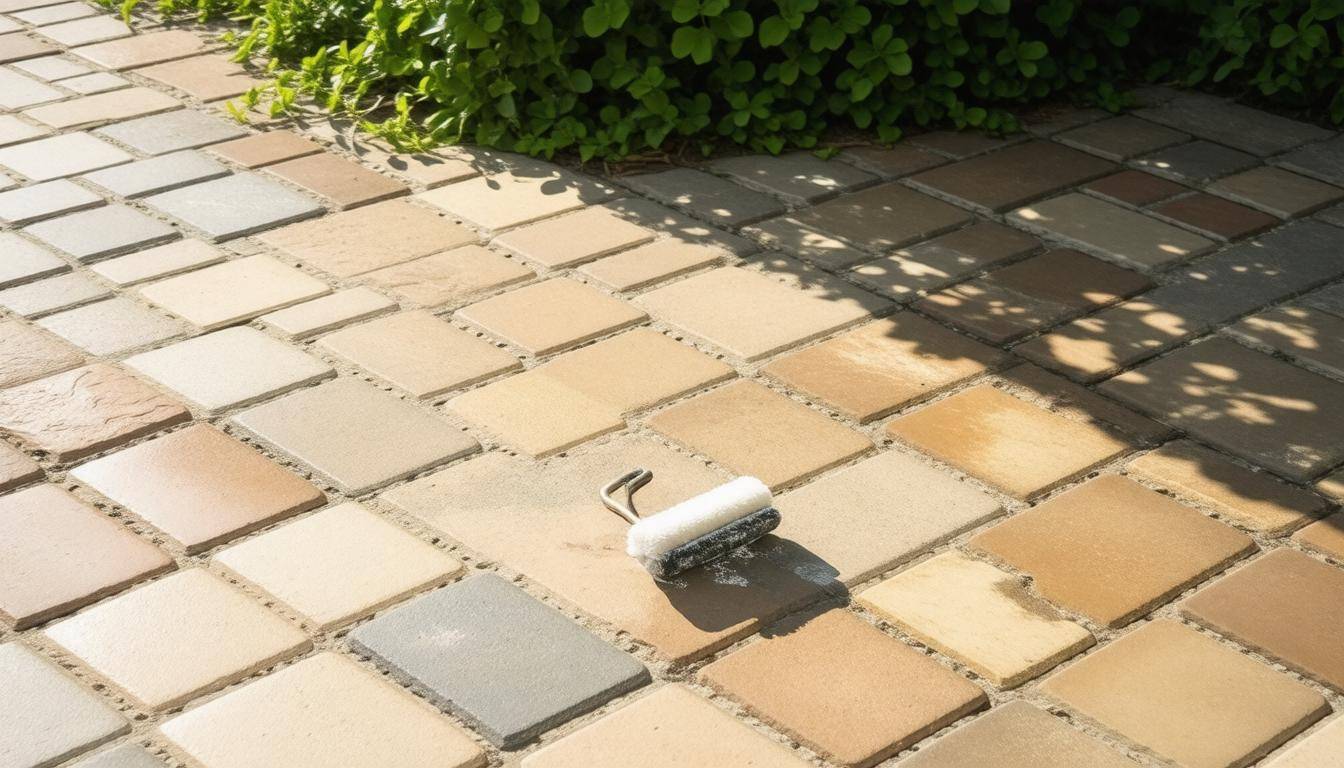
Resealing your paver patio isn’t just a routine task; it’s a vital step in maintaining the overall health and aesthetics of your outdoor space. Over time, exposure to elements like rain, sun, and snow can wear down the surface of pavers, making them look dull and vulnerable to stains. Resealing creates a protective barrier that guards against this wear and tear. In my experience, I’ve seen how a fresh seal can truly rejuvenate a patio, enhancing its appearance and extending its life significantly.

Resealing Benefits

The advantages of regular resealing are manifold. For starters, it protects the surface from unwanted stains—think spilled food at your summer BBQ or muddy footprints after a rainfall. Resealers also help to prevent erosion, ensuring your pavers don't shift or become uneven over time. Furthermore, this process enhances the color of the pavers, bringing out hues you might have forgotten were there. The recommendation for resealing every 2-3 years is not arbitrary; it's based on observations of normal wear patterns caused by environmental factors and foot traffic.

Once you decide to move forward with resealing, you’ll find yourself at a crossroads: should you go the DIY route or enlist professional help?

DIY vs. Professional Services

The allure of DIY projects often comes with the temptation to save money by tackling tasks on your own, including resealing your paver patio. While many DIY kits promise ease of use and efficiency, I’ve found that the thoroughness of professional services can be hard to replicate at home. A professional application ensures an even coat that penetrates deeply into every pore of the paver surface, which is crucial for maximizing protection. At PHX Paver, our expert team specializes in providing high-quality sealing services that not only protect but also enhance your outdoor investment.

However, the journey doesn’t stop at sealing; understanding ongoing maintenance needs is equally critical for keeping your patio in top shape.

Key Considerations

Regardless of whether you take on resealing yourself or hire experts, some important points must be kept in mind. Always check weather conditions before applying sealant—ideally, you'll want a dry day without high humidity for optimal drying. After resealing, avoid foot traffic for 24-48 hours, allowing proper adhesion and curing.

Nurturing your paver patio through regular resealing keeps it looking fresh while safeguarding against future damage. Each step in this maintenance routine is essential as we continue exploring ways to care for your outdoor investment effectively.

Repairing Paver Surfaces

Inevitably, your paver patio will require some repairs; therefore, knowing how to handle these issues is beneficial. Like any beloved outdoor space, the lifespan of your pavers depends heavily on regular maintenance and prompt repair when problems arise. Let's explore the steps for dealing with key issues you might encounter.

Dealing with Sunken Pavers

One of the most common concerns homeowners face is sunken pavers. This often occurs due to shifting earth or water erosion beneath the surface. To remedy this situation, start by carefully removing the affected pavers. It's important to store them safely so you don’t damage them further.

Once they're out, take a good look at the underlying area. If it's compacted dirt or gravel that has settled unevenly, fill the void with more sand to create a level base before reinserting the pavers. After leveling, don't forget to compact the area well; this helps ensure that over time it won't settle again—giving you renewed peace of mind.

Jake from Belmont shared, "Thanks to advice from PHX Paver, I fixed my sunken pavers seamlessly by myself!"

Replacing Broken Pavers

Sometimes pavers will become chipped or cracked beyond repair. When that happens, extraction is your best bet. Remove the damaged paver while being cautious not to disturb nearby ones. Clean the area thoroughly; any debris or leftover sand can affect how well the new paver fits in and looks once replaced.

Ensure that your replacement matches not only the texture but also the color of your existing pavers, which guarantees a uniform appearance across your patio.

"Replacing broken pavers with the same style kept my patio looking new and uniform," reiterated a local resident who understands the importance of aesthetics.

Filling Gaps and Cracks

Finally, let’s talk about maintaining structural integrity through gap and crack repair. Using polymeric sand is ideal for filling gaps between your pavers; it adapts effectively when water is added, practically locking your stones together and preventing weeds from popping through.

Similarly, for cracks that develop over time, consider a paver repair compound; these products are designed specifically for outdoor use, restoring strength while blending seamlessly into your current setup.

Comprehensive maintenance and seeking professional assistance when needed ensures that your paver patio remains a beautiful and durable outdoor space.

If you’re looking for expert advice, supplies, and maintenance services tailored to your needs, visit PHX Paver today!

In ensuring proper care and attention to your patio's needs, you'll be rewarded with an inviting outdoor space that stands the test of time. Keeping up with these essential maintenance practices enhances both aesthetics and functionality in your home environment.

Read More
Restoration Techniques Compared: An In-Depth Look at Methods and Effectiveness

Restoring outdoor spaces, whether it’s a cozy driveway or a vibrant patio, can often feel overwhelming with all the available techniques and options. Have you ever found yourself wondering which method would suit your needs best while also keeping your budget in check? You’re not alone! Many homeowners grapple with these decisions, weighing factors like cost, time, and effectiveness. Although paver restoration might seem straightforward, there’s more to it than meets the eye. This article dives into various restoration techniques—each with its strengths and weaknesses—to help you navigate your choices confidently, ensuring that your outdoor areas look their best for years to come.

When comparing different restoration techniques, it is important to assess their effectiveness and suitability based on the materials used, expected outcomes, and durability. Whether in the context of dental treatments or structural repairs, choosing the appropriate technique can significantly impact the longevity and success of the restoration effort.

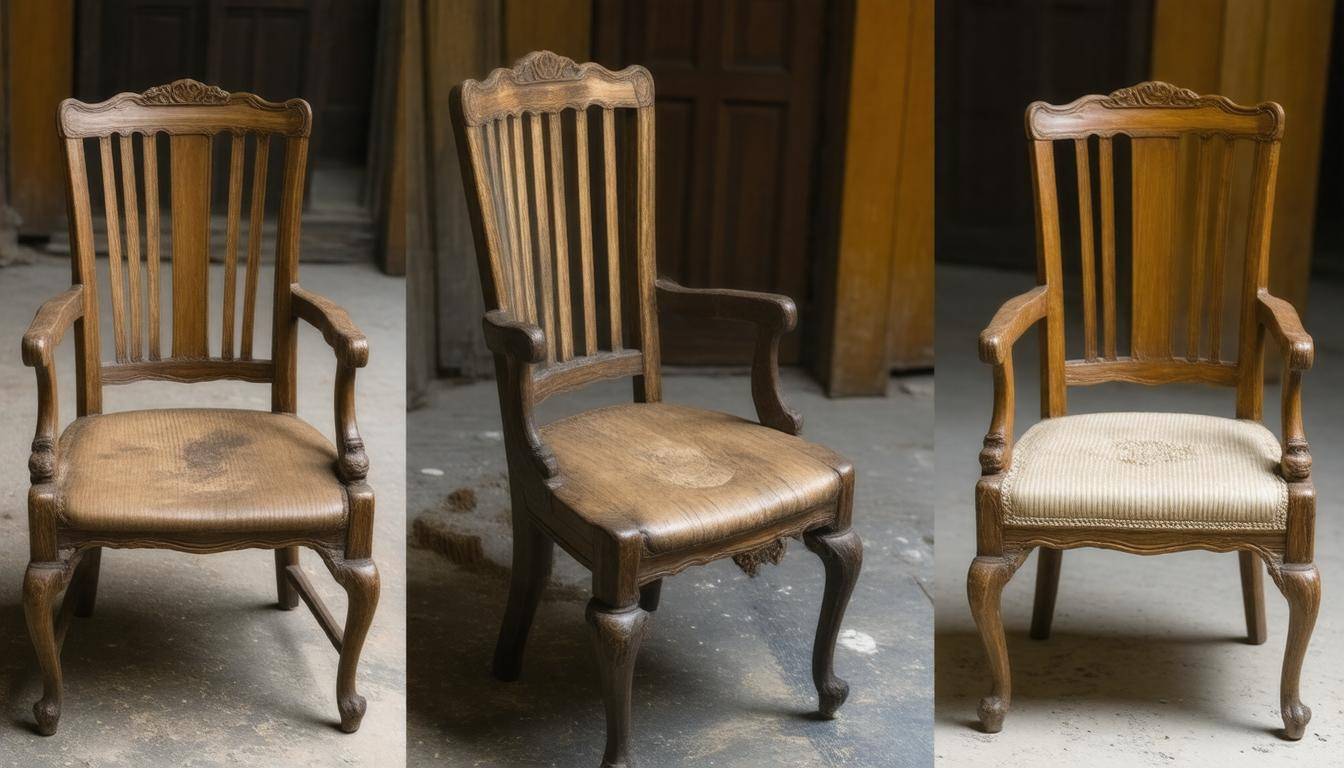
Wood chair restoration stages

Restoration Techniques Overview

One of the most effective methods in maintaining outdoor hardscapes is through sealing pavers. The sealing process creates a protective layer on the surface of the pavers, acting as a shield against stains from oils, food, or other substances that could mar their appearance. It also combats weeds that may sprout between the joints while offering protection from the sun's ultraviolet rays that can fade colors over time.

What's great about sealing is its affordability; when conducted by professionals, it can last up to three years before needing reapplication. For instance, at PHX Paver, sealing services start at an attractive rate of approximately $1.50 per square foot.

On the other hand, sometimes sealing might not suffice if your pavers have faced significant wear and tear, and that's where resurfacing comes into play.

Resurfacing pavers involves laying down a new layer of concrete or additional paver material atop the existing ones. This technique rejuvenates not only the look of your surface but also extends its lifespan without the laborious removal of old pavers. Generally averaging between $3 to $5 per square foot, resurfacing is ideal for surfaces that have lost their original beauty due to wear or damage while saving you from a complete overhaul.

While both sealing and resurfacing serve as beneficial options, there are circumstances where replacing the pavers entirely becomes necessary.

Replacing pavers means removing existing ones and installing brand-new materials, making it the most expensive solution ranging from $8 to $12 per square foot. Despite the higher cost, this option guarantees lasting results since it helps address any underlying structural issues that may cause problems down the line. Furthermore, it provides you with an opportunity to redesign your layout completely—offering flexibility should you wish to give your outdoor space a fresh new look.

Choosing among these techniques requires careful consideration as different scenarios may call for specific approaches. Next, we’ll explore how contemporary methodologies stack up against established practices in this field.

Modern vs. Traditional Methods

So, which holds up better: modern or traditional restoration techniques? Let's unpack this further.

Traditional Methods

Traditional restoration methods typically involve manual labor, where workers meticulously clean and replace damaged pavers by hand. This process, while time-consuming, provides an intimate touch to the restoration; skilled artisans often exhibit craftsmanship that reflects the character of your property. Techniques such as hand-scrubbing, washing with generic cleaners, or replacing individual pavers can yield satisfying results if done carefully. However, these methods have drawbacks, particularly their labor intensity and longevity in maintaining that fresh look.

While these approaches are less expensive upfront, they often require more frequent upkeep as they lack the protective benefits offered by modern technology.

As we consider the labor-intensive nature of traditional methods, it’s helpful to contrast them with their modern counterparts.

Modern Techniques

The landscape of restoration has been transformed by technology. Modern techniques employ tools like high-pressure washing systems that quickly remove dirt and grime from pavers without the need for extensive scrubbing. Furthermore, advanced sealants have emerged that enhance the appearance of pavers and create lasting barriers against stains and weathering.

These methods tend to be more efficient, allowing for quicker turnaround times on projects, which is appealing for both homeowners and professional services alike. Though they come at a higher initial cost, many users find that the longevity provided by modern sealants significantly outweighs this expense. Interestingly enough, innovative products now incorporate nanotechnology to enhance durability and stain resistance to previously unimaginable levels.

As you can see, while the upfront investment might be greater with modern techniques, many property owners consider them an investment into peace of mind and future maintenance savings over time.

In this debate of initial costs versus long-term savings, it becomes clear that modern methods provide substantial value through their efficiency and durability. While traditional restoration serves a purpose and holds charm, persistent advances in technology prompt many to favor the sleek results that modern treatments offer.

Choosing between these two methodologies depends on personal preferences and priorities. For those who appreciate tradition or need cost-effective solutions right away, traditional methods may make sense. Conversely, if you desire effective long-term solutions that withstand tests of time—and perhaps avoid costly repairs down the line—modern techniques are likely worth considering. Each choice comes with its own set of pros and cons; understanding them ensures an informed decision tailored to meet specific needs.

By assessing various techniques, one can gain insights into practical applications available today in restoration efforts.

Practical Restoration Applications

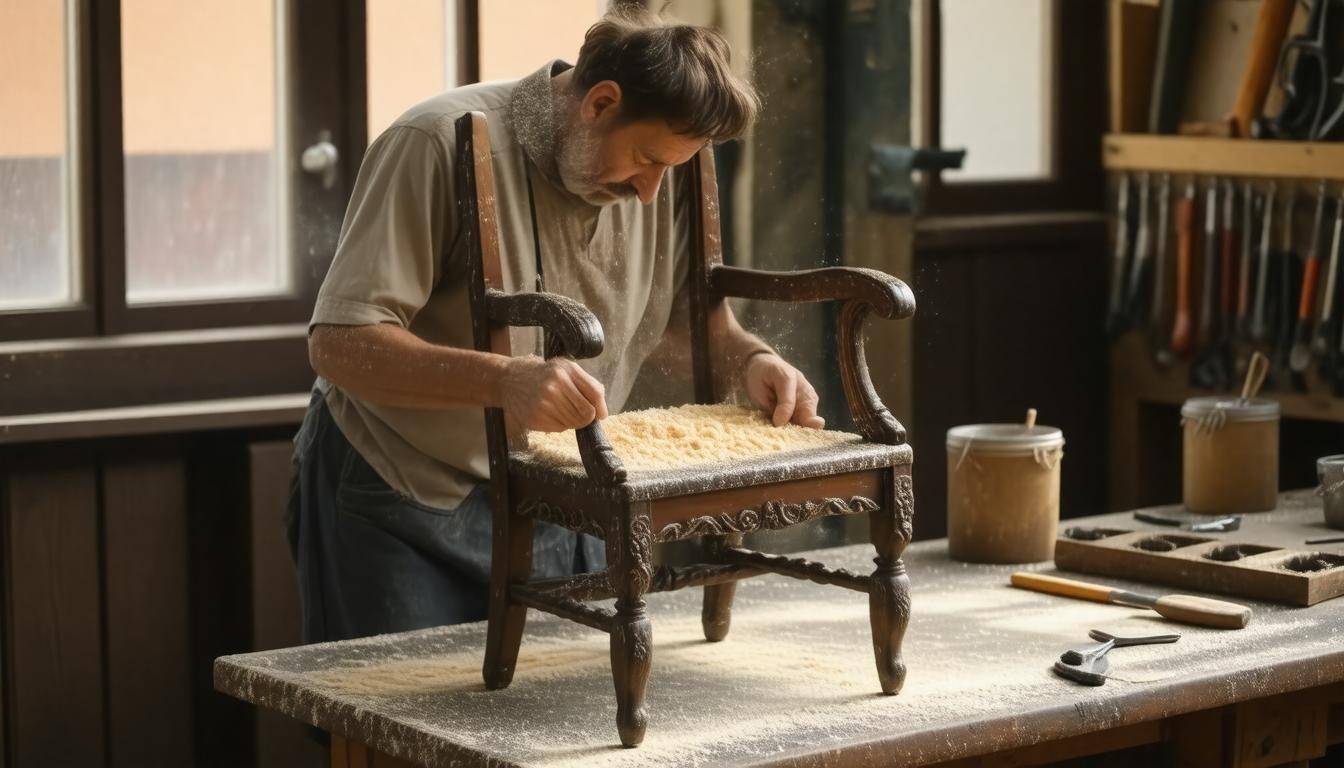
Artisan restoring chair

When selecting a restoration technique, it's crucial to keep the specific application in mind. For instance, when you think about residential settings, sealing is often the most appropriate choice for driveways. This method isn't just about aesthetics—it emphasizes cost-effectiveness and convenience. Homeowners are drawn to this technique because sealing can be applied rapidly, requires minimal downtime, and provides a protective barrier against unsightly oil stains that might mar concrete surfaces.

Imagine a family preparing for summer barbecues. A freshly sealed driveway not only looks inviting but also resists spills and stains from the latest grill session, allowing for easier clean-up. This makes sealing an essential part of home maintenance that marries form with function.

In contrast, commercial properties require different considerations due to their high-traffic environments.

Commercial Properties

Here, resurfacing emerges as a more suitable alternative. The reasoning behind this decision hinges on durability. With countless feet passing over these surfaces daily, businesses need robust solutions that withstand wear while maintaining an impressive appearance. Resurfacing offers these establishments the chance to rejuvenate their driveways or parking lots without the extended downtime associated with complete replacements.

Picture a bustling shopping center during a holiday sale season. Retailers need their parking lots to not only look pristine but also handle an influx of vehicles without succumbing to damage. Resurfacing allows property managers to refresh pavement conditions quickly, letting them capitalize on high foot traffic while ensuring customer satisfaction.

However, effectiveness extends beyond merely choosing techniques based on immediate needs; it involves anticipating future concerns as well.

Choosing Wisely

By understanding the practical applications of sealing versus resurfacing in different settings, property owners can make informed decisions that align with their long-term goals. Each method has unique benefits and best-use scenarios—knowing these allows you to optimize restoration projects whether for your home or a commercial property. This keen awareness encourages more sustainable practices and enhances both safety and visual appeal in diverse environments.

Next, we will examine how costs factor into the decision-making process regarding these restoration methods.

Cost Analysis of Techniques

Restoration tools and charts

When considering restoration methods, assessing their costs is essential not just for budget planning but also for determining long-term sustainability. One of the more prominent techniques is sealing. The cost of sealing ranges from $1.50 to $2.00 per square foot, making it a wallet-friendly option upfront. However, it’s important to remember that sealing isn’t a one-and-done deal; it typically requires reapplication every few years. This cyclical expense subtly accumulates, positioning sealing as an investment that balances short-term savings with future expenditures.

While sealing is a great first step, the next option on the table is resurfacing. This method averages between $3.00 and $5.00 per square foot. It strikes a balance between cost and longevity, appealing to those who want to enhance both aesthetics and functionality without breaking the bank. Resurfacing can breathe new life into worn pavers and often lasts longer than simple sealing—thus offering better value over time. It serves as a middle-ground solution for homeowners who want durability without committing to the highest expenses.

Speaking of expenses, when we turn our attention to replacement, we encounter the highest upfront cost.

The replacement of pavers typically comes in at $8.00 to $12.00 per square foot. While this makes it the heftiest financial commitment initially, it pays off with longevity benefits. Newly installed pavers offer superior resilience, often requiring minimal maintenance for many years to come. This means homeowners won't have to worry about frequent applications or restorations, allowing you to allocate resources elsewhere in maintaining your property—an aspect that can be quite appealing in the grand scheme of homeownership.

Choosing the right method depends largely on your budget and desired outcomes; weighing immediate costs against long-term benefits can ultimately save you both time and money in the future.

Understanding these costs is crucial for informed decision-making regarding restoration techniques. Your choice will influence not only how much you invest now but also how those decisions affect your property’s maintenance down the road. Whether opting for the cost-effective sealing method or committing to a more significant release with replacement pavers, being aware of these financial dynamics ensures you’ll choose wisely for lasting benefit and satisfaction.

As we explore further, it’s essential to consider how these techniques stand up in terms of durability and efficiency—enabling even greater insights into their overall effectiveness.

Durability and Efficiency Insights

When considering restoration techniques, understanding their durability is integral to making an informed choice. Sealing offers immediate benefits but comes with a catch: it’s not permanent. While professionally sealed pavers can endure three years of substantial use without notable wear, the need for periodic reapplication places a burden on maintenance schedules. This cycle can be seen as both an inconvenience and an opportunity, depending on how you approach upkeep.

The technique of sealing acts as a protective barrier against elements like water and dirt, but it does not replace the underlying surface. Therefore, while it may save you money upfront, consistent maintenance becomes essential to uphold its initial appearance. Imagine treating your favorite jacket; regular cleaning and occasional waterproof sprays will maintain its form long-term, but neglecting it could lead to irreversible damage.

When weighing this option, think about your lifestyle. If you frequently entertain guests or use the space for gatherings, sealed pavers might require more attention than you're willing to commit.

Resurfacing

Moving onto resurfacing, this method offers a compelling mid-range solution that balances cost with longevity. Resurfaced pavers are crafted with a new layer designed to restore their original integrity and aesthetics. Research indicates that these refreshed surfaces can last anywhere from 7 to 10 years, providing extended use without the need for frequent refurbishing.

Beyond just cost-effectiveness, resurfacing enhances slip resistance and visual appeal. It can transform weathered surfaces into something nearly brand new—a fantastic option for high-traffic areas where safety and aesthetics are crucial.

However, keep in mind that resurfacing works best when the original material is still sound. If the base structure has issues, resurfacing might push those problems under the rug instead of addressing them.

Replacing

The most enduring yet pricier option is replacing your pavers entirely.

When executed correctly, replacement can yield decades of service—sometimes exceeding 20 years—making it a strong contender for long-term solutions around homes or businesses built upon heavy traffic patterns. While this method demands a higher initial investment, consider it as putting money toward future savings; fewer repairs will often offset that initial cost over time.

Furthermore, modern installation techniques ensure a better fit that minimizes shifting or settling compared to older methods. With precise manpower during installation, you pave the way for longer-lasting benefits that don’t merely exist below the surface (much like a solid foundation in any construction project).

Think of replacement as building a new relationship; it requires effort and investment upfront but pays off substantially over years.

With these techniques laid out for comparison, let's now turn our focus to how these choices affect the environment and what implications arise from them.

Environmental Impact

Understanding the environmental consequences of different restoration methods is crucial for making informed decisions. The choices we make can significantly affect not just our immediate surroundings but also the broader ecosystem.

With increasing awareness of ecological issues, many professionals are now prioritizing sustainable practices in their projects. For example, modern sealants have adapted dramatically; today's products are increasingly eco-friendly, designed with water-based solutions that lower harmful volatile organic compound (VOC) emissions. This shift away from older solvent-based sealants helps protect both air quality and aquatic life.

Sealing Methods

While it's tempting to opt for cheaper, more conventional sealants, you're often trading short-term cost savings for long-term ecological harm. Choosing modern water-based sealants allows individuals to minimize their overall environmental footprint while still achieving effective results. Many of these new-age products offer excellent durability and protection without introducing toxic chemicals into our living spaces. By considering the implications of your material choices, you can take a more responsible approach to property maintenance.

This commitment to eco-friendliness extends beyond sealants and enters the realm of resurfacing techniques.

Resurfacing Techniques

Resurfacing offers another avenue to minimize environmental impact while still achieving satisfactory results. Unlike full replacements that involve removing existing materials entirely—leading to additional waste—resurfacing enables you to utilize what is already there. This practice conserves resources and allows homeowners to achieve a fresh look without overstretching their commitment to waste management and environmental degradation. The process emphasizes reuse, an integral concept in promoting sustainability.

However, it’s important to understand how less desirable options can still be managed effectively.

Replacement

Unfortunately, complete replacement generates the most waste during the restoration process. Many traditional methods involve discarding old materials, contributing to a growing waste crisis. Nevertheless, utilizing recycled pavers can significantly mitigate some of these concerns by reducing the demand for new materials and offsetting waste generation. By integrating recycled components into your restoration efforts, you're taking a proactive role in enhancing sustainability.

To encapsulate the three different methods in simple terms:

MethodEnvironmental Impact
SealingLow impact with eco-friendly options readily available.
ResurfacingMedium impact through reused materials.
ReplacementHigh impact but mitigated by recycling initiatives.

So what’s the takeaway? For those keen on minimizing their environmental footprint, opting for professional sealing services that employ sustainable materials or choosing resurfacing over total replacement will yield benefits for both you and the ecosystem. These choices allow you to align your property needs with values that protect our planet. The right decision not only reflects your personal ethos but contributes positively toward a more sustainable future.

By evaluating restoration techniques through an ecological lens, you'll play an active role in fostering a healthier environment for all.

Read More
How to Clean Pavers Effectively: Best Methods and Tips for Maintenance

Cleaning pavers might not be at the top of your to-do list, but trust me, it should be! Before you shrug it off as just another chore, think about how much a clean patio can brighten up your outdoor space and boost its curb appeal. After putting in time and effort to install those beautiful pavers, maintaining them is essential for keeping your investment looking fresh and lasting longer. Whether you’re gearing up for a family gathering or just want to enjoy the sunny days, knowing how to clean and care for your pavers properly will make a significant difference. So, let’s dive into some effective methods and handy tips that will have your pavers looking like new again!

To clean pavers effectively, start by removing loose dirt and debris with a broom or manual scrub brush. For stubborn stains, use a mixture of water and mild detergent applied with a scrub brush; alternatively, natural solutions like vinegar can also be effective, but always test on a small area first. Regular maintenance such as sealing your pavers after cleaning is highly recommended to protect against future staining and weed growth.

Cleaning pavers with pressure

Essential Tools and Cleaning Agents

To begin with, let’s explore the tools that are quintessential for the job. Each one has its own strengths and serves a specific purpose in ensuring your pavers come out looking brand new.

1. Tools Overview

A pressure washer stands out as an indispensable tool for deep cleaning pavers. Ranging between 1500 to 3000 PSI, it utilizes high-pressure water jets to dislodge stubborn dirt, grease, and moss from the surface effectively. This is particularly valuable for larger areas where scrubbing could be time-consuming and exhausting. It’s important to note that while these machines deliver impressive power, caution should be exercised to avoid damaging older or more delicate surfaces; adjusting the nozzle can help regulate pressure for different paver types.

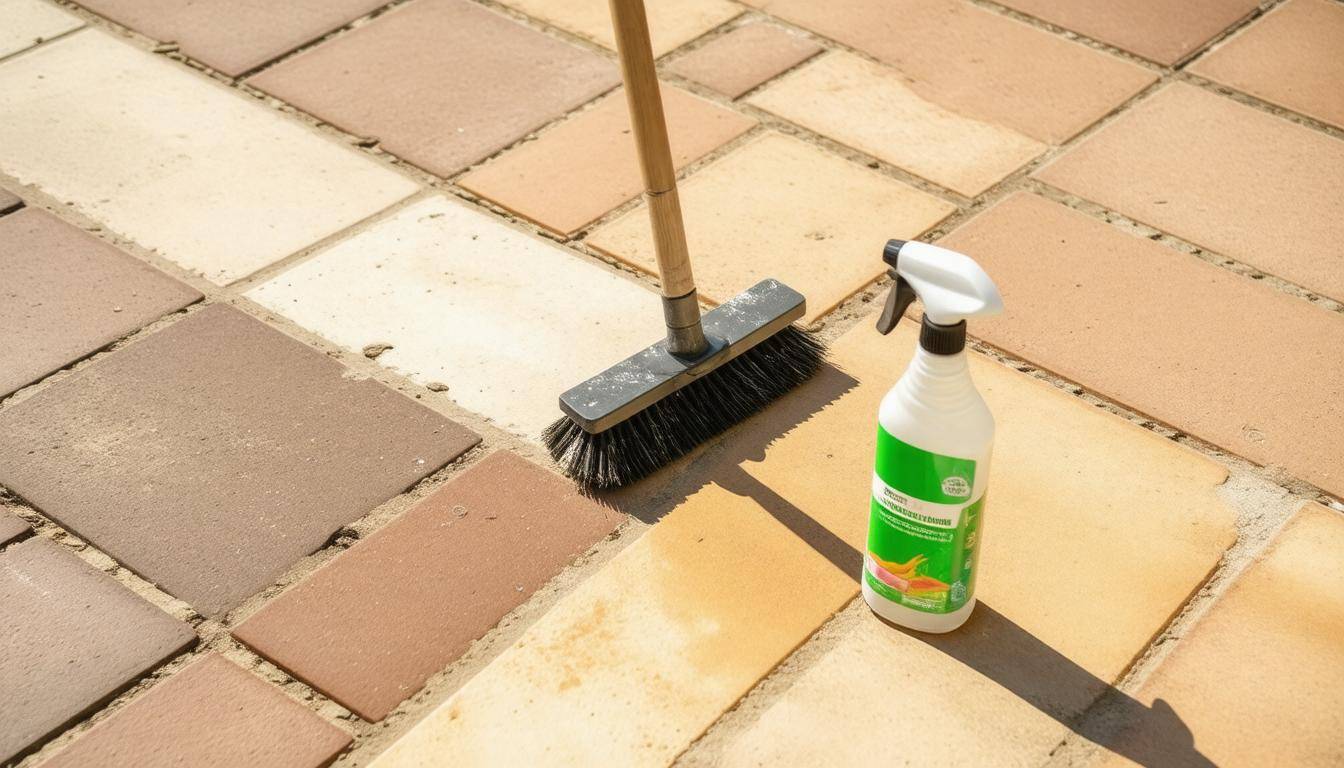
An equally vital tool is a soft-bristle brush. While pressure washing does wonders, there will always be nooks and crannies requiring manual intervention. Using this brush ensures that you scrub with enough vigor to remove debris without scratching or harming the paver's finish. You'll find it especially handy in corners and areas where the vacuum of a pressure washer cannot reach.

A reliable garden hose complements these tools well; it serves as an excellent way to rinse off any residual cleaning mixtures before or after using harsher methods. Additionally, buckets and sponges are excellent for hand-applied cleaning solutions—particularly when dealing with spot treatments or localized stains.

Don’t underestimate the usefulness of a putty knife, which is fantastic for addressing concerns like excess grout or dirt buildup lodged in cracks between stones. Regular maintenance uses this handy tool to keep those grout lines clean and tidy.

Lastly, effective cleaning isn't just about what you’re working on but also ensuring your safety with protective gear. Investing in a good pair of gloves and goggles is wise since it shields you from any chemicals you may use during the cleaning process.

Now that we've discussed essential tools, let's shift our focus to the cleaning agents that will bring your efforts to fruition.

2. Cleaning Agents

When it comes to cleaning agents, opting for products specifically designed for outdoor use makes all the difference in achieving optimal results without compromising environmental safety. A mild detergent serves as a universal solution suitable for general cleaning tasks, gentle enough not to harm your pavers while effectively cutting through grime.

For minor stains, a mixture of vinegar and water turns out to be surprisingly effective. This natural solution breaks down organic stains and works more conveniently than trying to scrub them away entirely. Just remember that too much acidity can damage certain types of stone, so it’s best applied cautiously.

If you're facing tougher stains that refuse to budge, then investing in a commercial paver cleaner might be your best bet. These specialized cleaners are formulated precisely for tackling tough stains such as oil or rust while preserving the integrity of your driveway or patio.

A beloved choice among environmentally conscious users is Simple Green, which provides a non-toxic formula effective at lifting years of dirt and grime without harming the surrounding environment—a necessity nowadays given the increasing preference for eco-friendly cleaning solutions.

Lastly, don’t overlook common household items such as baking soda, often forgotten yet exceptionally versatile when it comes to spot treatments on stubborn stains. With its slight abrasiveness, baking soda can help lift marks while remaining gentle enough not to scratch your beautiful pavers.

With each of these tools and agents at your disposal, you'll be well-equipped for a thorough paver cleaning session ahead. The next step involves ensuring those surfaces are correctly prepared before starting your revitalization process.

Preparing Your Pavers for Cleaning

Proper preparation ensures effective cleaning and helps avoid damaging your pavers. The first step is to clear the area by removing any furniture, grills, or planters from the paver surface. This may seem straightforward, but it’s crucial as it not only grants you unrestricted access to the entire surface but also prevents any accidental damage during cleaning. Imagine accidentally bumping a heavy grill against your freshly cleaned pavers; that’s not a pleasant thought!

Once the space is cleared, sweeping thoroughly becomes your next task. Armed with a broom, start sweeping away debris such as leaves, dirt, or twigs. The point here isn’t just tidiness; removing this surface-level grime creates a clean canvas upon which your deeper cleaning efforts can shine. It also prevents these particles from scratching or otherwise damaging the paver surfaces during the following steps.

Following a thorough sweep, it’s time to inspect for weeds and grout issues. Take a close look at those pesky weeds growing between the pavers—trust me, they love to make their home there! You can choose to remove them manually or apply an anti-weed solution; either way, ensuring a clean seam will give your pavers longevity.

While you're at it, take the opportunity to inspect the grout lines as well. Cracks or damage in these areas can further compromise the structure of your patio over time. Utilizing a putty knife can be effective here—just gently scrape out any damaged grout and replace it where necessary to avoid staining during cleaning.

Regular inspection and maintenance of your pavers not only enhance their appearance but also prolong their lifespan—a win-win!

With your pavers prepped and ready, you're about to venture into advanced techniques that will truly rejuvenate your outdoor space, paving the way for transformative results.

Cleaning Pavers with a Pressure Washer

A pressure washer is indeed one of the most effective tools for cleaning large areas of pavers. Its power enables it to reach deep into the crevices of paver surfaces, expelling dirt and debris in just a fraction of the time it would take manually. However, handling this powerful equipment requires some knowledge to ensure that your pavers remain unscathed throughout the cleaning process.

Step-by-Step Guide to Pressure Washing

Step 1: Adjust the Pressure

The first step is crucial: always start by setting your pressure washer to a medium pressure level. Too much pressure can cause noticeable damage; think of it as using a hammer when a soft touch is needed. You want to keep the nozzle approximately 12 to 18 inches from the surface and adjust it to a 30-degree angle. This angle allows you to clean effectively without risking etching or discoloring your beautiful pavers.

Step 2: Apply Detergent

Next, use a detergent attachment for your pressure washer—this does wonders in loosening stubborn grime! Select a biodegradable cleaner specifically designed for outdoor surfaces, as this will break down dirt without troubling plants or pets nearby. Spray this solution generously over the pavers and let it sit for about 5 to 10 minutes. If you're feeling adventurous, take this moment to sip on coffee while the detergent works its magic!

Step 3: Start Washing

Once that time has elapsed and you've enjoyed your brief coffee break, it's time to start washing. The key here is movement: maneuver the nozzle back and forth across the paver surface in gentle sweeping motions. If there are particularly stained areas, you might linger there for a moment, but don't forget to keep moving. This approach not only enhances cleanliness but also prevents any risk of damaging the surface.

Always remember that maintaining a distance between the nozzle and paver ensures that you’re protecting your investment while still achieving remarkable results.

After employing the pressure washer technique, keep in mind that some areas may benefit from additional attention through manual scrubbing. This extra layer of effort often proves essential in achieving a pristine finish, ensuring every corner is expertly addressed and free from hidden debris.

Scrubbing with Cleaning Solutions

Cleaning patio pavers

When it comes to areas that require more attention, using a scrubbing technique can be more effective than pressure washing alone. It’s all about making sure you’re using the right tools and solutions to get those pavers looking pristine. Begin by creating an effective cleaning solution tailored to your needs.

Preparing the Solution

The first step in this process is straightforward: mix a mild detergent with warm water in a bucket. It's best to choose gentle soaps like Dawn or similar brands that won’t harm the joint sand between your pavers. If you're leaning towards natural options, you can create a mixture of one part vinegar to three parts water. This option not only serves as an effective cleaner but is also eco-friendly.

Remember, the right cleaning solution sets the foundation for your scrubbing efforts!

How to Scrub Pavers

Once your cleaning solution is ready, it's time to roll up your sleeves and dive into some scrubbing. Grab a soft-bristle brush; it’s gentle enough not to damage delicate surfaces but firm enough to lift dirt effectively. Dip the brush into your bucket of soapy water and start applying it directly onto the pavers.

Use small circular motions as you scrub each paver’s surface, focusing on any stubborn stains or corners where dirt tends to accumulate. This technique not only cleans effectively but also prevents displacing sand from the joints, ensuring stability in your patio's structure.

A consistent approach is vital! Don’t rush through this step; instead, take your time, allowing the cleaning solution to penetrate the grime while you scrub away. If you find some areas are particularly dirty—like those infamous barbecue spill spots—apply a bit more pressure or let the solution sit for 5-10 minutes before scrubbing again.

After you've tackled most of the surface dirt, if stubborn stains remain, specialized treatments will be necessary to restore your pavers truly.

Additional Tips for Success

Never overlook the importance of regular maintenance. After scrubbing, make sure to rinse off any residual cleaning solution with clean water, ensuring no residue remains that could lead to discoloration over time. Aim for light cleaning every few months and a deeper clean annually.

Choosing Your Tools

Using a stiff-bristle brush can be helpful for textured surfaces, while a softer brush is great for delicate finishes or natural stone pavers. Choosing the right tool ensures that you won’t accidentally damage smaller or intricate details.

By investing time into this scrubbing method regularly, you'll maintain your pavers’ appearance and prolong their lifespan in your home.

With these foundational cleaning techniques in mind, we’ll now explore methods designed specifically for tackling those difficult-to-remove blemishes that might still cling stubbornly to your surfaces.

Removing Stubborn Stains

Cleaning supplies arranged

When you face persistent issues with your pavers, it’s essential to identify the type of stain you’re dealing with to apply the correct solution effectively. Some stains are more notorious than others: oil stains are among the most challenging, creating unsightly patches that detract from your outdoor space. Rust stains, caused by metal furniture or tools left on pavers, can also become ingrained over time, leading to stubborn discoloration. Finally, deep-set dirt can form from neglecting regular cleaning routines, making it harder to restore the beauty of your pavers.

Types of Stains and Solutions

For oil stains, the best approach is using a commercial paver cleaner specifically designed to break down oils. The process is simple: apply the cleaner directly onto the stain and let it sit for about 15 minutes. This waiting period allows the cleaner to penetrate the oil, effectively breaking it down before you scrub. Use a soft brush for scrubbing to avoid damaging the surface of your pavers. After scrubbing, rinse thoroughly with water to remove any residue; this step is crucial as leftover cleaner could affect future treatments or attract dirt.

If you’re facing rust stains, a paste made from baking soda and water can work wonders. Mix equal parts of each until it forms a thick paste. Apply this concoction directly onto the rusted area and leave it undisturbed for up to 24 hours. This duration allows it to penetrate deeply into the stain. Once the time is up, scrub gently with a non-abrasive tool and rinse well. If the stain persists after this treatment, don’t hesitate to reapply for better results.

When it comes to deep-set dirt, these stains can sometimes feel insurmountable. A heavier-duty cleaner like muriatic acid may be effective but should only be used as a last resort due to its potential dangers. Always adhere strictly to product instructions — proper dilution is key — and wear protective gear such as gloves and goggles during application. An alternative less aggressive route includes frequent pressure washing using your garden hose or renting a power washer if necessary.

Type of StainCleaning AgentApplication TimeAdditional Tips
OilCommercial Cleaner15 minutesUse a soft brush for scrubbing
RustBaking Soda Paste24 hoursRinse thoroughly and reapply if needed
Deep DirtMuriatic AcidFollow instructionsAlways wear protective gear

After tackling these stubborn stains effectively, maintaining your pavers' beauty and durability becomes vital. Taking proactive steps will ensure they continue looking pristine while preventing deeper issues down the road.

Maintenance Tips for Longevity

One of the most effective approaches to preserving the beauty and durability of your patio pavers is creating a regular maintenance routine that blends ease with efficiency.

For instance, sweeping frequently is critical; it may seem trivial, but removing leaves, dirt, and debris can prevent stains from taking root and becoming set over time.

Picture this: a simple act of sweeping can save your pavers from unsightly marks that could take hours of labor to remove later or even keep you from needlessly replacing costly sections.

Addressing spills immediately is another smart practice you can adopt, especially as we all know how some drinks can leave behind pesky stains if neglected longer than necessary. Think of red wine on beige pavers—it might ruin an outdoor evening if left unattended too long—prompt action will ensure those moments remain blissful.

In addition to immediate cleanups and routine sweeping, applying a sealer every two years is crucial for keeping your pavers in top shape.

When you apply a sealant, it acts as a protective layer against staining and weather damage while giving your surface a polished look. Many homeowners overlook this step, but sealant makes a world of difference in combating the effects of rain, snow, or harsh sunlight that can fade colors over time.

Remember to conduct regular inspections of your grout lines as well. These small spaces may seem insignificant, yet they play a vital role in overall stability.

Inspecting them for wear and tear allows you to catch issues early before they escalate into something more significant that requires full-blown repairs. If you spot cracks or shifts, addressing them promptly with grout repair ensures that any underlying problems are dealt with head-on instead of waiting for them to disrupt the entire area.

Consider reaching out for Phoenix Paver Sealing Service for professional assistance—they bring not only expertise but also advanced techniques for maintaining quality over time.

With diligence in these areas already established within your lifestyle, maintaining pristine pavers shouldn't feel overwhelming.

Regular inspections combined with effective cleaning practices have proven invaluable in enhancing the lifespan and appearance of your outdoor space. Embracing these habits will not only preserve your investment but also ensure healthy living conditions outdoors for years to come.

In summary, consistent care along with proper sealing techniques plays a pivotal role in extending the life and aesthetic appeal of your patio pavers. By adopting these maintenance tips, you contribute to the longevity and beauty of your outdoor environment.

Read More
Signs of Paver Damage: How to Spot Repair Needs Early
Pavers can add charm to any outdoor space, but like anything else, they have their ups and downs. Over time, wear and tear due to weather and heavy use can lead to problems that may not be obvious at first glance. If you’ve ever tripped over an uneven surface or noticed unsightly stains, you know how important it is to stay ahead of paver damage. Regularly checking on your paved areas means catching issues before they become bigger headaches—and potentially saving yourself a lot of money in repairs down the line. Let’s dive into some of the signs that your pavers might need a little tender loving care! Signs of paver damage include visible cracks and chips, discoloration or faded areas, uneven surfaces indicating shifting, and weakened edges that appear rounded or worn. Recognizing these indicators early is crucial for maintaining the integrity and appearance of your paved surfaces. Damaged paver driveway

Recognizing Paver Damage

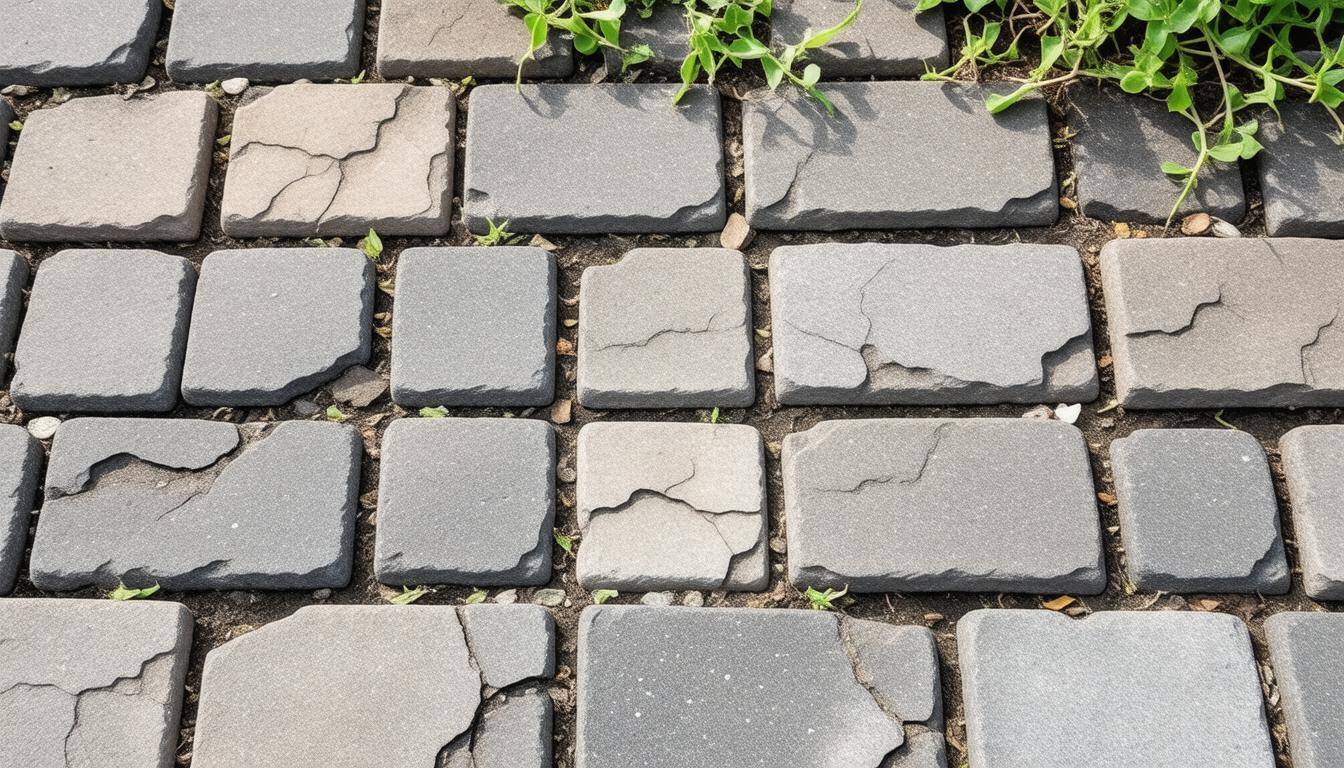
The first indication of trouble often comes in the form of cracks and chips. These surface imperfections usually result from temperature fluctuations that cause the materials to expand and contract. Even small hairline cracks can suggest underlying issues, while larger cracks and chips frequently indicate damage due to heavy loads or sudden impacts. Ignoring these signs can lead to deeper structural problems, so it’s best to address them sooner rather than later. Speaking of serious concerns, let’s discuss uneven surfaces, which can be even trickier to manage. An uneven surface arises when pavers shift or sink, leaving unsightly gaps or height discrepancies. Poor installation practices can sometimes bear the blame, but erosion caused by water infiltration is a common culprit. If you notice a paving stone that seems mismatched with its neighbors, it may mean that the foundation below is giving way, triggering instability in your walking areas. This brings us to staining and discoloration, another telltale sign of potential harm lurking beneath the surface. Stains from motor oil, salt, or organic materials can seep into the pore structure of pavers—especially if they are not adequately sealed—leading to dark spots or faded patches that detract from the overall aesthetics of your hardscaping. Likewise, moisture absorption from melted snow combined with salt can exacerbate color changes. Seeing these blemishes could be an early warning that immediate action is required to maintain the charm of your property. Recognizing these issues early allows for quicker intervention, which is crucial for maintaining paver health. A proactive approach not only saves you money on repairs but also safeguards your outdoor investments from permanent damage over time. Lastly, keep an eye out for more subtle signs like efflorescence—the white powdery residue that can appear on pavers due to excessive moisture and salt buildup. This not only looks unappealing but indicates underlying moisture issues, which, if left unchecked, can further compromise paver integrity. Understanding these signs will help you maintain your hardscaping effectively and ensure it remains an attractive element throughout the seasons. Moreover, being aware of what leads to such damage will empower you with knowledge for future prevention measures.

Common Causes of Damage

One significant factor leading to paver damage is the harsh influence of environmental conditions. For instance, freeze-thaw cycles that occur in colder climates can be particularly detrimental. When moisture seeps into the porous surfaces of pavers, it can freeze and expand during cold weather. This expansion exerts pressure on the surrounding material, often resulting in cracks or even complete structural failure over time. Observing a marked increase in damage rates—up to 20% faster—in areas with these extreme temperature fluctuations is alarming for homeowners.
As the snow melts, heavy rains can further exacerbate problems. It’s not uncommon for these conditions to erode the substrate beneath the pavers, causing them to shift or become misaligned. This shifting disrupts aesthetics and can also lead to unintended tripping hazards!
Moving beyond natural elements, let's consider the impact of installation quality. Poor installation practices significantly contribute to ongoing issues with paved surfaces. If installers use low-quality materials or fail to prepare the base properly, rapid wear and tear are often inevitable. For example, inadequate compaction of the base material can leave gaps or unsteady ground beneath the pavers, causing them to settle unevenly over time.

Installation Mistakes

These issues usually manifest as cracks, uneven surfaces, or even popping out of place. More concerning is the long-term integrity of the entire paved area; when installations cut corners on materials or techniques, it increases future repair needs dramatically. What seemed like an initial bargain for landscaping may turn into costly headaches down the line. By identifying these common causes of paver damage, homeowners can take proactive steps toward prevention and maintenance. Understanding how both environmental factors and installation practices play a part in your paved surfaces will better equip you to preserve their appearance and function over time.

Visual Signs to Watch For

One effective way to keep your paved surfaces in top condition is to regularly examine them for visible damage. The sooner you spot these issues, the easier they are to repair, potentially saving you both money and time down the road.

Erosion of Surface

Erosion is often the first indicator that your paver surfaces are suffering from external elements like salt or heavy traffic. You might notice a loss of sheen or color as the once vibrant pavers start to appear dull. This not only affects their beauty but also signifies that the surface is becoming fragile. Take it from someone who has seen pavers weathered by the elements — early intervention can drastically extend their lifespan.

Cracks and Chips

Look closely at the surface for any cracks or chips; these little imperfections may seem insignificant, but they indicate more serious underlying problems such as inadequate base support or moisture intrusion. If you observe gaps larger than 1/8 inch, it’s a clear call for concern. Left unchecked, these cracks can worsen, leading to costly repairs.

Uneven Pavers

Walking your paved area can reveal irregularities that are hard to miss. If you feel dips as you stroll or see water pooling in specific spots after rainfall, these are telltale signs of base erosion or shifting in your installation. Poor drainage is often an underlying cause here. It’s essential not just to rely on your eyes but also on how consistent the paver surface feels underfoot. As you assess these visual indicators, it's crucial to recognize how they may affect not only the aesthetics but also the functionality of your outdoor spaces.

Impact on Functionality

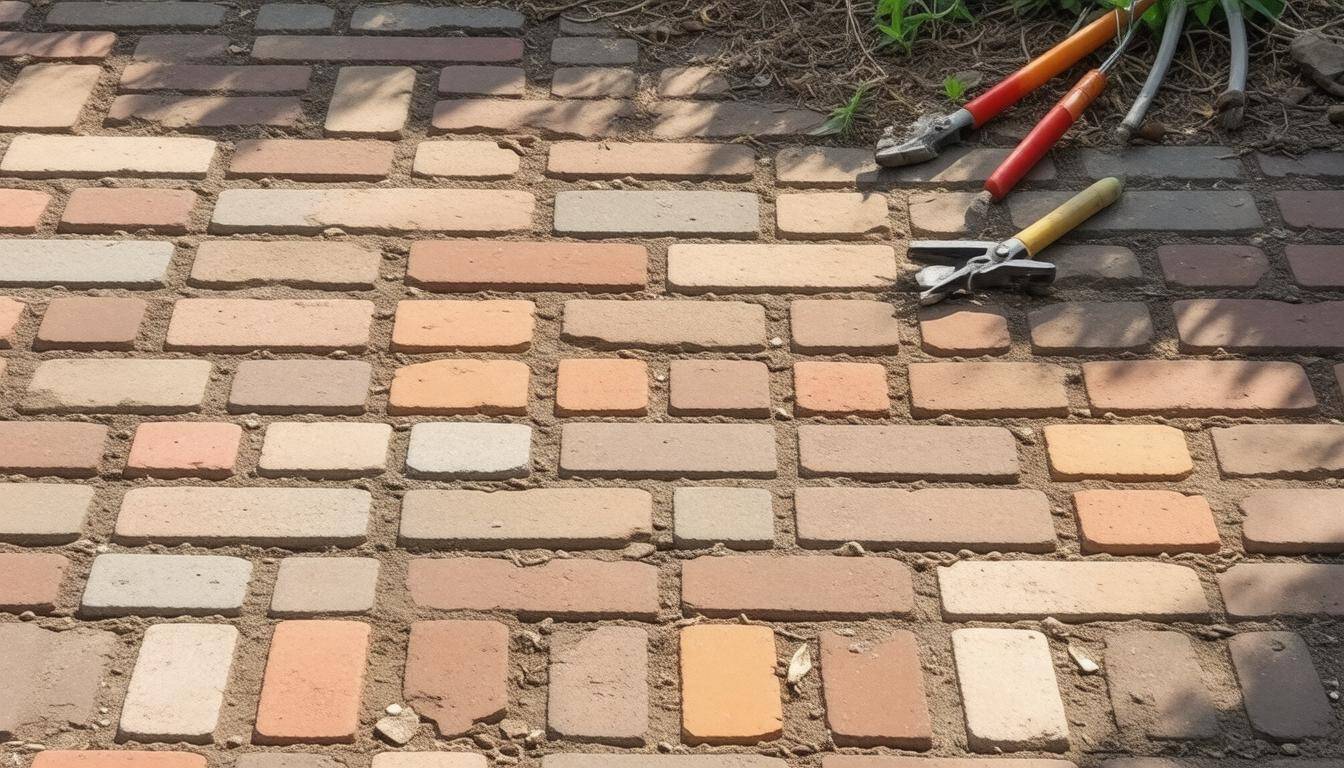
Cracked paver walkway When pavers become damaged or uneven, they disrupt the aesthetic harmony of your outdoor space and pose severe functional challenges that can affect everyday activities. One immediate danger presented by uneven pavers is trip hazards. A minor misstep could lead to a fall, which can be especially dangerous for children or older adults. Picture a child rushing outside to play or an elderly person making their way to the garden; a slight elevation change from one paver to another could result in injury. In commercial properties, this liability can have even graver implications, making it essential to address and rectify such hazards promptly. Such trip hazards are just one piece of the puzzle. As pavers start to settle or become sunken due to weather patterns or shifting ground, they may contribute to drainage issues. Water pooling in these uneven sections leads to an environment ripe for erosion and may create mud patches that further compromise stability. When water can't drain properly, it begins to form channels through cracks, sapping surfaces of integrity; this relentless cycle exacerbates underlying problems, leading to costly repairs down the road.
Reduced Lifespan

It's significant to note that untreated damage can drastically reduce the lifespan of your paving system. Studies show that neglected pavers can last 30-40% less time compared to those regularly maintained. This statistic underscores the importance of vigilance in regard to maintenance and repair. With timely interventions, you can dramatically prolong the life of your pavers and save yourself from future replacement costs—a typical insight drawn from our clients at Paver Rescue indicates that proactive measures can add approximately ten years to the life expectancy of your paved surfaces.
Properly addressing signs of wear as they emerge will enhance safety and promote longevity.
The correlation between aesthetic appeal and functional integrity emphasizes that regular upkeep is necessary—and should never be overlooked. If you notice any signs of damage, whether it be unevenness, cracks, or erosion, taking action immediately is crucial; a simple service call could protect your investment and keep your property safe for everyone who walks across it. Transitioning now into how you can effectively safeguard your pavers further ensures they're well-protected and maintain their inviting appearance over time.

Preventive Maintenance Tips

Cracked paver patio Regular inspections are one of the simplest yet most effective forms of preventative maintenance you can implement. Doing so every six months allows you to identify problems before they escalate into costly repairs. As the seasons change, the weather can take a toll on your pavers; extreme heat and cold can cause them to shift or crack. When you check your pavers, pay close attention to areas that show signs of wear like discolored spots or uneven surfaces. This proactive approach means you’re less likely to be surprised by deterioration later on.

Sealing the Pavers

Another crucial step is applying a quality paver sealant, which acts as a protective shield against moisture and staining. Once sealed, your pavers will not only withstand hydrostatic pressure from water but also repel unsightly stains from foods or chemicals used in landscaping. At PHXpaver, we specialize in professional sealing services that create a robust barrier, ensuring both aesthetics and longevity for your stone surfaces.

Cleaning and Weeding

Regular cleaning is just as essential for maintaining the beauty and functionality of pavers. It’s amazing how much dirt and organic matter can accumulate over time; removing these elements keeps your pathways safe and pleasing to the eye. Embrace a routine cleaning schedule that suits your lifestyle—whether it’s bi-weekly or monthly. Adding weeding between your pavers is equally important because unchecked plant growth can disrupt the joint sand and compromise the stability of your paving system.
Liz, a fellow homeowner in our community, has found success with a monthly cleaning regimen. "Since starting this routine," she shared, “I've noticed significantly fewer issues with stains and weeds creeping in."
Implementing these preventive measures fosters a healthier environment for your pavers, extending their life and enhancing their appearance. Next, let's explore the factors that indicate when it might be time for a change.

When to Consider Replacement

Sometimes, replacing your pavers is the most cost-effective solution. Recognizing the signs that it's time for a replacement is essential not just for aesthetics but also for functionality. One primary indicator is extensive damage. If you notice that over 30% of the paver area is cracked, chipped, or uneven, it might be time to consider a full section replacement. Continuous piecemeal repairs can often accumulate costs that surpass the expense of installing new pavers altogether.

Extensive Damage

Take a moment to visualize your paved area. Cracks and disfigurements disrupt not only the appearance but can also present safety hazards. When repairs become a frequent necessity, it’s wise to assess whether maintaining this patchwork approach serves your best interests.
Another factor to consider is aesthetic appeal. Over time, wear and tear can leave your paved surfaces looking worn out and unattractive. Staining or discoloration might diminish the charm of your outdoor spaces and could detract from your property's overall value. In cases where cleaning methods fail to restore luster, replacement offers an effective solution. Additionally, older pavers may be challenging to match with replacements, often compelling homeowners to refresh their entire surface for a cohesive look.

Aesthetic Appeal

Imagine hosting friends for an outdoor gathering and feeling embarrassed by unsightly stains marking your walkways. A clean slate with new materials not only elevates your home’s appearance but rejuvenates the joy of outdoor living—it's all about maintaining pride in your property’s presentation. Additionally, upgrades are another convincing reason to consider replacement. Old pavers may lack the resilience of modern materials that respond better to wear and environmental factors. For instance, switching to permeable pavers can facilitate drainage and significantly reduce water pooling issues compared to older options.

Material Upgrades

By investing in higher-quality materials today, you're setting yourself up for less maintenance down the line—saving both time and effort while enhancing your home's functionality.
Knowing when to opt for replacement rather than continuous repair helps maintain the beauty and safety of your paved surfaces while preserving your investment for years to come. Should you find yourself at a crossroads, professional services like those offered at Paver Rescue can provide insights tailored specifically for your needs as well as implementation expertise that ensures your project unfolds seamlessly.
Read More
Best Materials for Paver Restoration: A Guide to Top Choices

Paver restoration might sound like a daunting task, but it doesn’t have to be! If you’re looking to revive an old patio, walkway, or driveway, understanding the right materials and techniques can make all the difference. Not only does proper restoration enhance the aesthetic appeal of your outdoor spaces, but it also extends the life of your pavers, saving you money in the long run. With so many options available, choosing the best materials for your paver project can be overwhelming, but fear not! This guide will walk you through everything from essential sand types to other innovative materials that can breathe new life into tired surfaces. Let’s dive in!

The best materials for paver restoration include high-quality metal and ceramic, which are essential for repairing and maintaining the durability of the pavers. Additionally, using chiral crystals can enhance the repair process by providing a versatile resource for topping off repairs and ensuring longevity in structural integrity.

Restored paver driveway

Essential Materials for Paver Restoration

First and foremost, high-quality paver sand is crucial for creating a stable base beneath your pavers. This isn’t just any sand; rather, you want something like masonry or sharp sand, which has a finer texture perfect for filling in gaps and ensuring a snug fit between pavers. The beauty of using such quality sand lies in its ability to prevent shifting over time, thereby enhancing the overall stability of your paver surface. Without this critical layer, you're likely to encounter problems down the line, such as uneven surfaces or dislodged pavers that can turn a beautiful pathway into a hazardous one.

Polymeric Sand

Moving on to polymeric sand, this innovative material serves an important role in keeping your pavers looking sharp. Unlike regular sand, polymeric sand is a mix of fine grains combined with special additives that help it bond when it gets wet.

This hardening property does wonders in deterring weed growth, acting as both a physical barrier and a sealant. Additionally, it significantly reduces erosion caused by water runoff or wind, meaning you don’t have to worry about re-sanding your joints frequently, saving you both time and money.

When considering replenishing materials for your restoration work, concrete sealers cannot be overlooked. They offer essential protection against stains and wear due to environmental factors. Depending on your specific needs, you might opt for water-based sealers, known for being user-friendly and environmentally safer with a lifespan of 2-3 years, or solvent-based sealers that penetrate deeper and provide greater durability lasting between 3-5 years. Check out what works best based on your location's climate and the level of traffic your paved areas experience.

Here’s a quick look at the pros and cons:

TypeBenefitsAverage Lifespan
Water-BasedEasy application; lower toxicity2-3 years
Solvent-BasedHigh durability; deeper penetration3-5 years

Replacement Pavers

Unfortunately, even the most well-maintained pavers can become damaged over time—whether from extreme weather conditions or heavy usage. This is where having replacement pavers on hand becomes invaluable. It is advisable to keep some extra pavers of the same type and color for emergencies. Quick access to these materials can save you time when addressing unsightly cracks or broken pieces that not only affect appearance but could also lead to safety hazards if left unchecked.

Next, let's explore the techniques required for effectively preparing these surfaces, laying the groundwork for successful restoration.

Surface Preparation Techniques

To achieve a flawless paver restoration, proper surface preparation is crucial. Think of it as laying a strong foundation before building a house. If you don’t take the time to prep the surface, the materials may not adhere correctly, and you might end up with uneven or unsatisfactory results. Here’s how to ensure your surface is perfectly primed for restoration.

Step I - Cleaning the Surface

Start by getting rid of all that dirt, moss, and those pesky weeds that seem to grow overnight. Utilizing a high-pressure washer with at least 3000 PSI is ideal for blasting away debris while saving you the backache of manual scrubbing. However, if you prefer a more hands-on approach, a stiff-bristle brush can also do wonders when combined with a biodegradable cleaning solution like a vinegar-water mix. This not only ensures your pavers look fresh but also maintains an eco-friendly approach.

It’s essential to allow the cleaned surface to dry thoroughly for at least 24 hours before moving forward with repairs.

Step II - Leveling the Ground

Once your pavers are squeaky clean, it's time to focus on leveling the ground beneath them. An uneven base can lead to shifting pavers and unsightly gaps in your installation. For this task, you’ll want to use a tamper to compact the soil firmly — think of it as giving it a little TLC so that it can support your beautiful pavers seamlessly. You want to create a solid foundation that will stand the test of time.

When compacting soil, it’s helpful to check with a level between tamping sessions. Adjustments may need to be made in some areas to ensure that everything is even from edge to edge.

Step III - Removing Failed Joints

Before diving into new installations and repairs, inspect any old joint sand between the pavers. If it's failing or crumbling, this sand needs to be removed using a chisel or screwdriver. It’s crucial because old, compromised materials can prevent new polymeric sand from bonding correctly with your pavers. Clean joints help secure the integrity of your repair work and contribute significantly to its longevity.

With a clean surface ready and ground prepared, you're now set to tackle those important details that will help enhance durability in your restored pavement.

Fixing Cracks and Filling Joints

Addressing cracks and filling joints isn't just a cosmetic procedure; it's essential for maintaining the longevity of your pavers. Environmental factors such as rain, extreme temperatures, and fluctuations can lead to cracks. If left untreated, these cracks compromise the entire structure, leading to costly repairs. Taking a proactive approach now will save you headaches—and money—later on.

Crack Repair

The first step in tackling paver maintenance is effectively repairing those unsightly cracks.

To fix larger cracks, opt for a high-quality concrete patch. This material bonds well and helps restore stability to the cracked area. For smaller fissures, a slurry mix made from paver sand serves as a fantastic alternative. Imagine mixing the same type of sand used in the joints with a bit of water—it creates a thick paste that fills gaps effectively. One product I've had great success with is Envirobond’s joint stabilizing sand. Not only does it fill those small cracks perfectly, but it also works seamlessly with existing materials to maintain cohesion!

Pro tip: Always clean the crack thoroughly before applying any filler. Using a wire brush can help remove loose debris and ensure that your patch adheres properly.

Filling Joints

Once you've tackled the cracks, it’s time to focus on filling the joints between your pavers.

Start by removing any old joint sand. This task can be tedious; however, it’s essential for a proper seal—think of it as preparing a canvas before painting. After clearing out the old material, sweep in new polymeric sand to replace it. When applying this new material, use a broom liberally to ensure every crevice is filled completely.

Here's an insider secret: Wetting the surface before completing this step activates the binding agents within polymeric sand, enhancing its effectiveness against water and erosion over time.

As you continue your maintenance journey, allow these materials ample time to set before putting your pavers back into use. This patience pays off in how well you preserve your outdoor surfaces and enhance their aesthetic appeal.

Now that you've addressed the structural integrity and joint aesthetics of your pavers, let's shift our attention toward further enhancing their visual charm.

Products to Enhance Paver Aesthetics

Brilliant paver aesthetics

Enhancing the visual appeal of your paver surface can be achieved through a variety of products that add color, texture, and protection. When choosing enhancements, think about how they will improve both the beauty and longevity of your paver installation. A well-chosen product can elevate the appearance and functionality of your paved areas.

Color Enhancers

These products penetrate the paver surface to bring out natural colors, making your pavers look vibrant and new. Such enhancements not only deepen hues but also offer resistance against fading—an essential factor for maintaining aesthetic appeal throughout all seasons. For homeowners looking for easy application with lasting results, products like Color Boost or SealThane are popular choices. These formulas are designed to rejuvenate the color in your pavers, remedying any dullness due to weather or wear while providing a protective layer at the same time.

When applying a color enhancer, ensure that the surface is clean and dry; this helps achieve the best bond and finish, allowing vibrant colors to shine every time you step outside.

Paver Sealers

Now, let’s talk about sealers. Applying a sealer protects pavers while enhancing their color and providing a glossy finish. Think of sealers as a protective blanket for your flooring; they guard against stains from spills, oil drips, and dirt accumulation that can tarnish even the finest materials over time.

Sealers help shield against weather damage, increasing defense against erosion caused by rain or extreme sun exposure. Choosing a quality sealer is critical because it significantly impacts both durability and aesthetics. Imagine walking across beautifully sealed pavers that maintain their color and sheen even after years of weathering—enticing indeed.

Data suggests that using a good sealer can reduce fading from UV rays significantly—by as much as 50%—ensuring your investment remains visually stunning year after year.

To maintain that visual appeal, regular upkeep is essential. Strategies for sustaining your paver surface’s pristine condition involve more than just occasional enhancements. Let's explore practices that contribute to its long-term vitality.

Long-Term Maintenance Tips

Restored paver patio

Regular maintenance practices are essential to preserving both the appearance and structural integrity of your paver surface.

One of the simplest yet most effective ways to keep your pavers looking sharp is through routine cleaning. Engaging in straightforward tasks such as sweeping away debris and using a garden hose to wash the pavers can significantly reduce the buildup of dirt and grime. Neglecting this can lead to discoloration, which makes it harder for your pavers to maintain their original charm. A gentle rinse now and then revitalizes their look and helps prevent stains from forming.

Beyond just cleaning, you'll want to look at what's happening within the joints of your pavers too.

Routine Cleaning

Over time, the sand that fills the joints between each paver can wash away, compromising their stability. This is where reapplying joint sand comes into play. I recommend using polymeric sand—a special blend that hardens when wet—every 2-3 years. Not only does it reinforce the joint structure, but it also helps fend off pesky weeds that could disrupt that beautiful setup you've created.

After ensuring your joints are packed tight, the next step is to guard against the elements with a sealant.

Sealing

When it comes to sealing your pavers, don't overlook its importance for long-term durability. Depending on the type of sealer you’ve opted for, reapplication should be considered every 2-5 years. For instance, if you've chosen a water-based sealer, aim for that 2–3-year mark to maintain maximum protection against stains and weathering. This proactive approach will help defend against fading due to sun exposure while keeping those natural tones intact.

But let’s not forget the battle against nature itself; weeds can be relentless.

Managing Weeds

To actively minimize weed growth, consider using a weed prevention product or even a natural solution like vinegar. Regularly treating your paved surfaces with these methods will deter those green invaders from taking root between your pavers and causing potential damage over time. Remember that keeping your space tidy encompasses more than just aesthetics; it's about maintaining function and form as well.

A commitment to these long-term strategies will foster an outdoor area that remains inviting and durable while effortlessly transitioning us into discussing professional insights that elevate paver care techniques.

Expert Recommendations for Paver Care

Engaging with professionals can make all the difference when it comes to maintaining the beauty and functionality of your pavers. Experts like those from PHX Paver bring specialized knowledge and access to high-quality materials that you might not find at your local hardware store. By leveraging their expertise, you can ensure that your brick pavers are treated with precisely what they need to withstand the elements.

Consulting a Professional

When you consult professionals, they examine your specific paver surfaces and provide tailored advice based on conditions unique to your area. Whether it's considering local weather patterns or assessing traffic wear, their insights are invaluable. For instance, they understand how sun exposure can lead to fading, prompting suggestions for sealing products that offer UV protection. This foresight helps prolong the life of your pavers while saving you money in the long run.

Customized Maintenance Plans

A tailored maintenance plan is crucial for optimizing the longevity of your pavers. After a thorough inspection, a professional might recommend strategies based on factors such as nearby vegetation and drainage patterns. In areas prone to heavy rainfall, experts often suggest more frequent joint sand applications to prevent washout that could compromise stability. Furthermore, these customized plans help spot issues before they escalate into costly repairs, allowing homeowners to maintain pristine outdoor spaces without breaking the bank.

High-Quality Materials and Techniques

The quality of materials used during maintenance directly impacts durability and overall appearance. Many homeowners have noted remarkable transformations after hiring services like PHX Paver. As one satisfied customer shared: “After hiring PHX Paver, our patio not only looked brand new but stayed in top condition through multiple seasons.” This testimonial emphasizes that using specialized techniques along with quality sealers ensures homes retain their aesthetic appeal while preventing structural issues.

Prioritizing professional input, customizing maintenance strategies, and utilizing high-grade materials is key to unlocking the full potential of your paver surfaces.

By investing in expert recommendations and quality materials, you can achieve beautiful, lasting results in your outdoor spaces.

Read More
Essential Questions to Ask a Paver Contractor Before Hiring

Hiring a paver contractor can feel overwhelming, especially when you want to ensure your outdoor space turns out beautifully and lasts for years. After all, this isn’t just about laying down some stones; it’s a significant investment that can enhance your home’s curb appeal and functionality. To help you navigate the process, it’s important to ask the right questions before making your decision. By getting the answers to essential inquiries regarding experience, materials, and warranties, you’ll be better equipped to choose a contractor who understands your vision and can bring it to life. Let’s dive into the key questions you should consider asking a paver contractor before hiring them for your project.

When interviewing a paver contractor, it’s essential to ask about their experience and expertise in the specific type of paving work you need, request references from previous clients, and inquire about the materials they use and the warranties they offer. Additionally, ensure to discuss timelines for project completion and obtain a detailed estimate that outlines all costs involved.

Paver contractor's tools

Questions to Ask About Their Experience

First and foremost, one of the most pivotal questions you should ask is, "How long have you been in business?" A contractor who has spent several years honing their craft, like Phoenix Paver Restoration, has likely faced various challenges and developed effective solutions over time. This longevity often translates into reliability and assurance that the job will be done right. In fact, according to industry studies, contractors with over ten years of experience tend to report higher customer satisfaction rates. They have weathered market changes and learned how to maintain the standards necessary for lasting relationships with clients.

But simply relying on the years alone isn’t enough; it’s equally important to dive deeper into their practical experience.

Asking "Can you provide examples of similar projects?" can give you invaluable insight into what you can expect. A reputable contractor should easily share a portfolio showcasing previous work, particularly projects that align closely with your own specifications. This not only lets you see the quality of their workmanship but also helps you assess whether their style matches what you envision for your outdoor space. Look for detailed images and client testimonials — they are powerful indicators of how well they meet demands just like yours.

With practical examples in view, another question surrounds professionalism:

It’s crucial to inquire about "Do you have any industry certifications?" Credentials hold weight within the paver industry and show commitment to high standards of practice. For instance, certifications from recognized organizations like the Interlocking Concrete Pavement Institute (ICPI) can reassure you that the contractors have undergone specific training and understand industry best practices. These certifications can make a difference when it comes down to techniques used during installation, maintenance, and overall project execution.

By focusing on these specific inquiries, you'll build a clearer picture of potential contractors' qualifications and approach while ensuring they align with your paving project goals. This lays the groundwork for discussing crucial aspects such as materials and methods involved in your upcoming project.

Discussing Materials and Methods

The quality of materials and methods used directly impacts the durability and aesthetics of your project. It's essential to engage your contractor in a detailed conversation about their approach to both, as these factors can make or break your investment in pavers.

1. What Types of Pavers Do You Recommend?

Different pavers offer various benefits, and selecting the right kind for your specific project can significantly enhance its longevity and appeal. For instance, concrete pavers are known for their versatility; they come in many shapes and colors, making them a practical choice for almost any setting.

On the other hand, if you’re aiming for a classic or rustic look, consider brick pavers, which might be more costly but add a timeless charm to pathways or patios. This is why it’s important to ask contractors what types they recommend based on their expertise and past work—they often have valuable insights that can guide your decision.

2. How Do You Handle Subbase Preparation?

A solid foundation under your pavers is critical. If the subbase isn’t prepared correctly, you could face sinking or shifting over time, leading to costly repairs down the line. When speaking with potential contractors, ensure they describe their subbase preparation process in detail.

Do they start with excavation to remove existing soil? Will they ensure leveling and compaction? These steps are just as vital as the pavers themselves. You should feel confident that they understand the best practices for creating a stable base that supports long-lasting results.

3. Do You Use Sealants and What Types?

In addition to choosing the right pavers and preparing a solid foundation, sealants are another layer of protection worth considering. They help keep your pavers looking pristine by shielding them from stains, moisture, and fading caused by sunlight.

Research indicates that sealed pavers can last up to 30% longer than unsealed ones—a substantial improvement that pays off over time. So when interviewing contractors, ask what types of sealants they use and how they apply them—this knowledge can ensure your patio or driveway is not only beautiful but also resistant to wear.

Engaging in conversations around these topics will give you greater insight into the capabilities of your chosen contractor and allow you to make informed choices for your paving project. With this groundwork established, let's explore how to interpret estimates and understand pricing structures more effectively.

Decoding Quotes and Costs

Detailed cost breakdown

Understanding a quote’s breakdown is essential not just for avoiding hidden costs but also for ensuring your budget remains intact. A well-organized estimate acts as your roadmap, guiding you through each phase of your paver project, whether it's cleaning, sealing, or restoration. One of the first things to confirm with a contractor is whether they can provide a detailed written estimate. This document should comprehensively outline all the elements of the job, including labor and material costs, thus offering you peace of mind upfront.

1. Can You Provide a Detailed Written Estimate?

When speaking with your potential contractor, ensure they offer a transparent written estimate. This estimate should include specifics about the type of materials to be used, costs associated with labor, and an overview of any additional expenses that might arise throughout the project. A reputable paver restoration service like Phoenix Paver Restoration understands this aspect well—after all, transparency builds trust. An organized estimate not only helps in planning your finances but also serves as protection against unexpected changes down the line.

Once you have a firm grasp on what is included in your estimate, it’s prudent to dig deeper into any potential extra costs.

2. Are There Any Potential Extra Costs?

No one likes to be caught off guard when it comes to expenses. This is why asking about possible variables leading to additional charges is crucial during discussions about estimates. For instance, unforeseen issues such as soil instability or an increased need for materials could lead to extra costs not initially factored into the original price. Engaging in this conversation ensures that both you and the contractor are prepared and aligned on how such circumstances would affect the overall cost.

"The key to reducing stress during renovations lies in being proactive about potential extra costs."

With that said, it’s important to establish expectations regarding the payment process as well.

3. What Is Your Payment Schedule?

A standard practice many contractors follow involves collecting a deposit upfront, setting up installment payments during the work's progress, and then requesting a final payment upon project completion. However, exercise caution: if a contractor requests full payment upfront without justifiable reasons or milestones to guide the work, reconsider before proceeding. It’s crucial that payment schedules reflect progress and accountability on both sides.

Managing these financial discussions will result in smoother interactions with your contractor and allow you to focus on enjoying your beautifully restored or newly sealed pavers without worrying about surprise fees.

With a clear understanding of costs and payment expectations, we can now shift our focus to another important aspect—the guarantees and warranties offered by contractors.

Ensuring Guarantees and Warranties

Guarantees and warranties are vital components when hiring a paver contractor, providing not only peace of mind but also security in your investment. A contractor who offers robust warranties demonstrates confidence in their work, which is crucial for any homeowner considering a significant project. Therefore, as you explore potential contractors, it’s important to ask specific questions regarding their warranty policies.

1. Do You Offer a Warranty on Your Work?

When looking for a contractor, it's imperative to ensure they provide a warranty that covers their work. A reputable paver contractor should stand behind their services, reflecting accountability for the quality of craftsmanship and materials used. Ideally, you want to see warranties that span at least one year, but longer periods are even more advantageous. Such warranties should encompass both materials and workmanship.

Imagine making an investment in your home and not having the security that comes with such assurances. For example, Phoenix Paver Restoration offers warranties on our paver sealing service, ensuring clients have confidence in every project we undertake.

2. What Does Your Warranty Cover?

Next, you should circle back to specifics: understanding what exactly the warranty covers is paramount. Clarify if it protects against common issues such as cracking, shifting, or water damage. Failure to address these conditions could lead to costly repairs down the line. Often, homeowners overlook asking whether the warranty extends to both labor and materials required for any necessary repairs.

This clarity can save you unexpected expenses later; no one wants unanticipated costs arising from issues that should have been covered under warranty.

3. How Are Claims Handled?

Furthermore, it is essential to comprehend the process for filing a warranty claim. Understanding how claims are managed can prevent frustration if issues arise later on. Think of it like an insurance policy; you wouldn’t purchase one without knowing how it operates and how you might file a claim if needed. Therefore, request a written warranty document that lays out all the terms in plain language so there can be no misunderstandings later.

With these critical questions in hand, you're well-equipped to ensure you're making informed decisions about your investment. Now let's shift our focus toward establishing a realistic schedule for your upcoming project.

Planning Your Project Timeline

A clear project timeline ensures your paver restoration progresses smoothly and finishes on schedule. It helps you visualize the steps involved, making the entire experience manageable and less daunting.

Imagine planning a party; you wouldn’t want guests showing up to an unfinished celebration! In the same vein, having a well-defined schedule prepares you for every facet of the project and keeps everyone accountable.

1. What Is Your Estimated Start Date?

One of the first questions you should ask your contractor is about the estimated start date. This allows you to synchronize your plans with theirs, ensuring that any personal scheduling conflicts are avoided.

Think about important events—perhaps family gatherings or vacations—that could coincide with the work being done. If your contractor suggests a date, discuss if it can be adjusted if necessary. Clear communication now can save headaches later when unexpected scheduling issues arise.

2. How Long Will the Project Take to Complete?

Next, inquire about how long the project will take to complete. A ballpark figure from your contractor can set realistic expectations for you. It’s also wise to discuss potential delays—as in any outdoor renovation, factors outside our control, like rain or extreme heat in Phoenix, can impact timelines significantly.

Your contractor should have strategies in place to handle these kinds of delays. Whether they plan to adjust working hours or allocate extra resources during crunch time, understanding their approach gives you confidence that any hiccups won’t derail the whole operation.

For example, consider how weather conditions play a role: if a storm is forecasted, what’s the plan? Discussing contingencies ahead of time allows you to prepare both mentally and logistically.

3. How Often Will You Provide Updates?

The importance of communication cannot be emphasized enough during a paver restoration project. Regular updates keep you in the loop regarding progress and help manage expectations effectively.

It’s wise to establish how often you’ll receive these updates—sometimes contractors may need daily check-ins while other projects might only require weekly discussions.

Agreeing on a schedule fosters a sense of teamwork between you and your contractor. This way, if issues crop up—such as requiring additional materials or addressing modifications—you’re informed right away, instead of finding out at the end when it's too late to incorporate vital changes.

With these fundamental questions covered, let’s move towards understanding how to ensure your contractor is reputable by verifying their references and credentials.

Checking References and Credentials

Contractor credentials review

Verifying a contractor’s references and credentials not only establishes their legitimacy but also significantly impacts the quality of work you'll receive. When approaching this process, you want to be thoughtful—after all, your home deserves the best treatment possible.

1. Can You Provide References from Previous Clients?

One of the first questions to ask should be about previous clients. Speaking directly with them offers real-world insights into the contractor's work quality and professionalism. This isn’t just about hearsay; it's about uncovering specific experiences.

Did they meet deadlines? How did they handle issues that arose? Did the clients find their work aesthetically pleasing? Evaluating these factors can help you gauge what working with that contractor might be like for you.

Imagine stepping into the shoes of those past clients, hearing firsthand about both triumphs and challenges. Their stories can illuminate aspects you might not have considered. Prioritize this step; it’s your opportunity to gain a clearer picture of who you’re hiring.

2. Are You Licensed and Insured?

The next critical point is to confirm whether the contractor holds the necessary licenses and insurance. Not only does this legitimize their business, but it also protects you as a homeowner. According to a report by the Better Business Bureau, more than 31% of complaints against contractors stem from unlicensed or uninsured work.

This should raise red flags immediately if a contractor cannot show proof of licensing or insurance coverage. Having proper insurance means that should any accidents happen on-site, you won’t be left holding the bag financially. It’s a crucial element—diligence here is essential for peace of mind.

3. Do You Have Any Industry Affiliations?

Another important consideration is industry affiliations. Ask if they are members of respected groups such as the Interlocking Concrete Pavement Institute (ICPI) or the National Association of Home Builders (NAHB). Membership in such organizations signifies commitment not only to professionalism but also to ongoing education within their industry.

For example, being part of the ICPI suggests adherence to best practices and standards vital in paving services. Contractors associated with reputable associations often undergo training and keep updated with modern technologies and methodologies. This can give you added confidence in their skills and reliability.

By thoroughly checking references, confirming licenses, insurance, and assessing industry affiliations, you're setting yourself on a path toward successful project completion.

For superb service by qualified professionals, consider reaching out to Phoenix Paver Restoration at (602) 714-1608 or visit PhxPaver for more information on how we meet these criteria and exceed customer expectations in the Phoenix area.

Ultimately, asking these essential questions can save you time, money, and headaches down the road while ensuring that your paving project is executed with precision and professionalism.

Read More
Cost of Professional Paver Restoration: Pricing and Benefits Explained

When it comes to enhancing the look of your outdoor spaces, professional paver restoration might just be the secret ingredient you’ve been missing. Imagine stepping outside to a beautifully restored patio or pathway that feels inviting and fresh. However, you may be wondering about the costs involved and whether hiring experts is worth it. Don’t worry; you're not alone in this contemplation! Many homeowners grapple with similar questions, especially when trying to maintain or improve their property. This article will break down what you can expect in terms of pricing for professional paver restoration, the benefits of investing in this service, and how to determine if it’s the right choice for your specific needs. Let’s dive in!

The cost of professional paver restoration typically ranges from $1 to $3 per square foot, depending on the extent of the work needed, such as cleaning, sealing, and repair of damaged areas. For accurate pricing tailored to your specific project, it is advisable to request a free estimate from a local paver sealing service.

Restored paver patio

Factors Affecting Paver Restoration Costs

1. Material Quality

The type of material used for pavers is one of the most significant determinants of restoration costs. High-end materials like travertine or granite not only enhance the aesthetics of your outdoor space but also demand specialized care when it comes to their maintenance.

This elevated level of care can substantially increase expenses. For example, while the restoration of premium stone pavers could set you back around $20 to $30 per square foot, more budget-conscious concrete options might fall within the range of $10 to $15 per square foot. Choosing what's right for your project involves a balancing act between desired longevity and upfront cost.

Another crucial aspect to consider is who will be doing the work.

2. Labor Costs

Labor costs vary significantly based on the intricacy of the tasks required. If you're just cleaning and sealing your pavers, this tends to be less labor-intensive and therefore more affordable. However, if you find yourself needing leveling, repairing, or taking on major restorations, those prices can escalate quickly.

On average, labor charges typically hover somewhere between $1 and $5 per square foot. Keep in mind that complex jobs require skilled artisans who understand the intricacies of different materials—their expertise comes at a price!

Interestingly, labor costs may decrease for larger areas due to economies of scale. For instance, pricing is often more favorable when restoring an expansive patio compared to a small walkway. This makes considering full restoration worth your while.

Yet another key factor you should keep in mind is your geographical location.

3. Geographic Location

The place where you live plays a vital role in determining both material and labor costs for paver restoration. In urban settings, you’ll often see higher rates due to increased demand and cost of living; however, these locations tend to have better availability of supplies, which could save you transport fees in the long run.

Conversely, while rural spots may offer lower rates for labor—given fewer overheads—transporting materials from farther distances can add unexpected costs to your overall budget.

Understanding these geographical dynamics allows you to tailor your project more proficiently; sourcing materials locally in Phoenix could minimize transportation fees, especially relevant when hiring specialized services like those offered by Phoenix Paver Restoration. They know the local market well and offer competitive rates alongside free estimates, making them an excellent choice for homeowners looking for expert paver cleaning and sealing.

With all these factors in mind, it’s essential to grasp each element involved in paver restoration as it not only aides in budgeting but also ensures that your investment enhances the beauty and longevity of your outdoor spaces.

As we continue exploring options and choices ahead, examining how the costs compare between professional services and DIY approaches will provide deeper insights into making informed decisions.

Professional vs. DIY Cost Comparison

Many homeowners grapple with the decision to tackle paver restoration projects themselves or hire professionals, such as Phoenix Paver Restoration. While the idea of doing it yourself can seem appealing, particularly from a cost-saving perspective, the reality often tells a different story. The allure of saving money by cutting out labor costs is quickly tempered by other unexpected expenses.

For instance, while a DIY paver cleaning kit may initially appear affordable at about $150, you still need to factor in the costs of renting or buying equipment such as pressure washers, which typically range around $200 or more.

To break it down further, consider the following potential expenses:

  • DIY Costs:
    • Cleaning agents ($30-$50)
    • Pressure washer rental ($50-$100/day)
    • Sealing product ($150-$200)

In contrast, Professional Costs typically hover around $1 to $5 per square foot, which includes not just labor but also all necessary equipment and materials required for the job.

However, let’s ask ourselves: why should we even consider professional services when it seems so straightforward? The answer lies in several crucial advantages they provide.

When you enlist professionals like Phoenix Paver Restoration, you're placing your project in the hands of experts who bring extensive knowledge and experience. This translates into time savings; while you might spend your weekend attempting to manage everything on your own, someone skilled can get the job done efficiently without compromising on quality. Additionally, their work reduces the risk of costly mistakes that come from inexperience, whether it’s uneven sealing or missed spots during cleaning.

An expert touch can enhance not only the appearance but also the longevity of your pavers. Quality professional work ensures that each step—from cleaning to sealing—is carried out meticulously, safeguarding your investment for years to come.

With these considerations in mind, it's clear that expertise in paver restoration comes with significant benefits. Let's now explore the essential offerings provided within this specialized field to further understand what you might need for your project.

Key Services in Paver Restoration

Paver restoration in action

One of the foundational steps in maintaining your paver surfaces begins with cleaning. This process is not just about aesthetics; it's crucial for the overall health of your pavers. Basic cleaning involves physically removing dirt, algae, and minor stains that can detract from their appearance. While a simple pressure wash may suffice initially, deeper issues such as stubborn stains or grime may require chemical treatments for effective removal. Using professional-grade cleaners can yield better results, ensuring that the pavers are clean and prepared for further treatment.

After successfully cleaning the surface, the next critical step is sealing. Sealing acts as a protective barrier against the elements, mold, and other potential stains that could mar the beauty of your pavers. Approximately 30-50% of the total restoration cost will go into sealing alone, but this investment pays off by significantly extending the life of your pavers. Imagine having a beautiful patio that withstands harsh weather and remains immaculate over time—this is what proper sealing achieves. The right sealant creates a waterproof layer, preventing moisture from penetrating and causing damage underneath.

Another integral part of the restoration process is joint stabilization. Once the pavers are cleaned and sealed, stabilizing the joints is paramount to preventing movement and erosion over time. This involves adding sand to fill gaps between pavers and compacting it to ensure everything locks into place securely. Not only does joint stabilization prevent weed growth, but it also contributes substantially to maintaining the structural integrity of your paved area. The cost associated with this service is minimal compared to its benefits—investing a little now can save you a lot later in repairs.

Taking detailed care of these key services in paver restoration—cleaning, sealing, and joint stabilization—ensures robust long-term results. By working together as a cohesive process, they enhance not just the appearance of your outdoor space but its durability and functionality as well.

As you consider these essential services, it’s important to understand how hiring experts can elevate their effectiveness and longevity in your landscaping journey.

Advantages of Hiring Professionals

Professional paver restoration

First and foremost, when you hire a professional service like Phoenix Paver Restoration, you’re tapping into a reservoir of expertise and skill that most DIYers simply can’t access. These professionals understand not only the aesthetics involved but also the technical aspects related to different types of materials used in patios, driveways, and walkways.

For instance, did you know that using an acidic cleaner on limestone pavers can lead to irreversible damage? This kind of knowledge separates seasoned professionals from amateurs. They have the experience required to select the right cleaning agents that will restore your pavers without compromising their integrity.

Next comes the question of time.

Many homeowners find themselves surprised by how long a DIY paver restoration project can take. It often stretches across several weekends and may even lead to a less-than-satisfactory outcome if you aren't careful. In contrast, a professional team can revitalize your outdoor space significantly faster—often within just a day or two—without cutting corners or sacrificing quality. Imagine walking outside to enjoy your newly restored patio just days after hiring experts! It's this kind of efficiency that makes investing in professional services so attractive.

Yet another layer of value surfaces when we consider long-term cost savings.

While it’s true that hiring professionals may come with higher upfront costs, it's important to weigh those expenses against what they save you over time. Professionals are well-equipped to extend the lifespan of your pavers through effective cleaning and sealing processes, which means fewer repairs down the line. With our specialized service at Phoenix Paver Restoration, for example, not only do we clean and seal pavers effectively but we also help minimize future maintenance needs. You might find that what seems like an expense now could lead to significant savings later on—as those well-maintained pavers last longer and stay in better condition.

Investing in professional paver restoration is about safeguarding your investment for years to come while enjoying a hassle-free experience. When searching for quality results, particularly in the Phoenix area, look no further than local experts who prioritize thoroughness in every project—our free estimates at Phoenix Paver Restoration ensure you're informed every step of the way!

As we continue, let’s explore details on assessing costs and planning your budget for these essential services.

How to Estimate Your Costs

To get started on estimating your paver restoration costs, the first step is to measure the area you want to restore. This process includes more than simply eyeballing it; accuracy is key. Grab a tape measure or, even better, a digital measuring tool if you have access to one. Walk around the space, measuring both the length and width of the desired area. Once you have those numbers, multiply them to calculate the total square footage. For instance, if your patio measures 10 feet by 14 feet, then you’re working with 140 square feet that might need some love.

With those measurements in hand, it's time to zero in on what specific services you'll need for your pavers.

The second step is identifying your service needs. Do you merely require a light cleaning to freshen things up, or are there deeper issues at hand such as cracks that need repair or heavily soiled areas needing deep cleaning? Understanding this will enable you to tailor your quote more accurately. A simple cleaning might be less expensive compared to full-on sealing treatment and repairs, which can drive the cost up significantly.

Step III - Factor in Material Quality

Now that we’ve assessed both measurements and service needs, let’s talk about material quality.

The third step involves identifying the type of pavers you're working with. Different types of materials can impact the overall cost of restoration significantly. For example, concrete pavers might be cheaper to clean and seal than natural stone pavers due to their availability and ease of maintenance. By gaining clarity on what you have—brick, stone, or concrete—you can gather an accurate estimate that reflects the reality of both labor and materials involved.

If all of this seems like a lot to juggle don’t worry! You can simplify your process by using our free online estimator. It will provide you with an instant quote based on your inputs—taking the guesswork out of your restoration planning.

By taking these steps methodically, you are not just guessing but crafting a well-informed plan for your paver restoration project. Accuracy here means fewer surprises later on—and ultimately a more satisfying outcome for your home enhancement!

As we explore further, consider how to enhance the longevity and efficiency of your investment through strategic planning and care practices.

Maximizing the Value of Your Restoration Investment

Restoring your pavers is an investment in your property, and thoughtful follow-up care can make a world of difference. One effective strategy is regular sealing. By applying a high-quality sealant either annually or bi-annually, you create a protective barrier against rain, snow, sun exposure, and stains. This simple step combats wear and tear significantly, keeping your pavers looking as good as new while saving you money on future restoration services.

But don’t stop there; staying vigilant about prompt repairs is just as crucial. Minor damage—such as small cracks or joint separations—can quickly escalate if left unattended. Addressing these issues immediately not only helps maintain the structural integrity of your pavers but also prevents costly repairs down the road. Remember that while tackling these repairs yourself may seem tempting, consulting professionals can often provide the best solutions tailored to the specific type of damage you're dealing with.

It's important to remember that proactive care pays off. Taking care of minor problems now will save you from major headaches later.

Another vital component to ensuring your pavers remain beautiful and functional is using quality products. Opt for cleaning and sealing options specifically designed for pavers. These specialized products contain formulations suited to withstand the elements, offering better protection and longer-lasting results than regular cleaners or sealants you might find at your average store. The upfront cost is worth it when you consider the preservation it offers.

ActionBenefit
Regular CleaningProlongs lifespan
Annual SealingProtects against weather
Prompt RepairsReduces long-term costs
Quality ProductsEnsures a better finish

By integrating these practices into your maintenance routine, you will effectively extend the life of your pavers and ensure that every dollar spent on restoration is justified. You’re not just investing in aesthetics; you’re making a long-term commitment to your property’s value.

For expert assistance in restoring and maintaining your paver surfaces in Phoenix, reach out to us at Phoenix Paver Restoration or call (602) 714-1608 for a free estimate today! Our team specializes in delivering exceptional quality and service that enhances the beauty and longevity of your outdoor spaces.

Investing in professional paver restoration not only boosts the visual appeal of your property but also safeguards its value over time. Make smart choices that will serve you well for years to come.

Read More
How Long Does Paver Restoration Take? Understanding the Process and Timeline

Paver restoration can feel a bit overwhelming, especially if you're unsure of how long the process will take. Whether it’s your charming backyard patio or a robust driveway that needs sprucing up, understanding the timeline for restoration is essential. After all, you want to get it right without having to deal with unexpected delays or messy complications. In this article, we’ll break down the paver restoration process into simple steps and give you a clear idea of what to expect, so you can plan your renovation with confidence and ease. Let's dive in and uncover what the journey entails!

The paver restoration process typically takes about 1 to 3 days, depending on various factors such as weather conditions and the size of the area being restored. This includes time allocated for cleaning, re-sanding, and allowing the sealant to dry properly before use.

Paver restoration process

Estimating Your Paver Restoration Duration

Estimating the duration for paver restoration isn't as daunting as it sounds; it primarily revolves around understanding a few factors, including the size of the area and the specific tasks required. For instance, a small patio of about 200 square feet might take approximately 2 to 3 days to complete, while larger projects like a driveway spanning 600 square feet could easily demand up to a week.

Let’s break it down further: cleaning typically requires one day, allowing sufficient time for the area to dry before any further work can begin. If repairs are needed, this step may add another day to your timeline. Then comes the re-sanding phase, where fresh polymeric sand is applied – this is crucial for proper joint filling and stability. Finally, sealing the pavers wraps up the restoration process, which may need an additional day or two for full curing.

In essence, this creates an approximate overall sequence: cleaning, drying, repairs and re-sanding, followed by sealing; each plays a pivotal role in achieving optimal results.

With that in mind, let's consider how different project sizes influence this overall timeline.

Project SizeEstimated Time (days)
Small Patio (200 sq ft)2-3
Medium Walkway (400 sq ft)4-5
Large Driveway (600 sq ft)5-7

As you can see from our table above, it's essential to remember that these times are estimates. Larger areas often come with increased complexity as well as potential challenges such as damage or wear that could require additional attention and time. Furthermore, adverse weather conditions, such as rain or cold temperatures, can significantly impact drying times for both the cleaned surface and the applied sealant.

From our experience at PHX Paver, clients have frequently shared that hiring professionals not only expedites completion but also ensures thoroughness that DIY attempts may overlook. Utilizing our knowledgeable team enables you to navigate unexpected challenges efficiently, resulting in beautiful restored pavers in less time than anticipated.

Keep in mind that planning is key when aiming for efficient renovations; understanding the necessary steps helps smooth out the process and optimizes the overall time commitment as we explore further specifics related to project timelines.

Key Factors Affecting the Timeline

Weather conditions present one of the most critical hurdles during a paver restoration project. Adverse weather, such as rain or extreme temperatures, can significantly hinder various stages of the process. For example, heavy rain can wash away newly applied sand, complicating re-sanding efforts and requiring you to start again.

Similarly, during sweltering summer days, if the sealant dries too quickly, it may not adhere properly—leading to an inferior finish that could necessitate reapplication down the line. Addressing these challenges requires flexibility and patience, making it essential to monitor local weather forecasts before scheduling your project.

Another significant factor is the extent of damage to your pavers.

If your surfaces display moderate wear, such as minor stains or light surface erosion, you can expect the restoration process to move along rather smoothly. However, if there are deep stains or structural issues like cracked or uneven pavers, you'll need to factor in additional time for more intensive cleaning and repairs.

This may involve extensive power washing and re-leveling to ensure everything is safe and secure before proceeding with sealing. The greater the damage, the longer your restoration will likely take.

In addition to these physical attributes of your pavers, the type of sealer you decide to use greatly impacts both application time and effectiveness.

Choosing between solvent-based and water-based sealers introduces different timelines and outcomes. Solvent-based sealers typically create a thin protective film that establishes stronger resistance against external elements but require more careful handling due to longer drying times. These sealants often necessitate fewer coats but may extend overall project duration due to their intricate curing process.

Conversely, water-based options allow a quick finish with faster curing times yet might demand multiple applications for optimal performance. This choice requires thoughtful consideration of your specific needs; balancing durability with efficiency can drastically alter directly how long you’ll be working on your restoration project.

Understanding these factors helps in planning the restoration more effectively.

With all these variables considered, proper planning is paramount. Recognizing that weather conditions can change unexpectedly and assessing the condition of your pavers allows you to prepare adequately for potential delays and adjust timelines accordingly.

Take the time to evaluate the type of materials you intend to use in conjunction with these aspects; this awareness guarantees a smoother experience when restoring your outdoor space while also ensuring that both aesthetics and functionality are preserved for years to come.

As we explore further, let’s focus on the first crucial steps in getting your outdoor area back on track, emphasizing effective cleaning techniques and necessary repairs.

Initial Cleaning and Surface Repairs

Paver cleaning in progress

The journey of paver restoration begins with cleaning; this process is invaluable for enhancing aesthetics and prolonging the life of your pavers. Over time, dirt, grime, and even moss can build up, making your outdoor area not just unsightly but potentially hazardous. This is where power washing comes into play.

Power Washing

First things first—using a power washer can effectively blast away stubborn dirt, algae, and mildew that have become embedded over time. This step usually takes about half a day for a smaller area, like a patio or walkway. However, if you’re dealing with a larger or particularly grungy surface, allow a full day for this crucial task. Patience is key here; the cleaner your surface is before re-sanding, the better the outcome will be after sealing. After the power washing, it’s best to let the area dry completely to avoid trapping moisture under the sealant later.

Once everything is spotless, inspect the pavers closely for any signs of damage. This brings us to surface repairs—the next critical step in the initial cleaning phase.

Surface Repairs

When cleaning is complete and the surface has dried, check for cracks or uneven pavers. Minor cracks can often be filled using polymeric sand, which not only helps repair while offering flexibility during temperature changes but also acts as a joint stabilizer. Applying this sand requires an even application along every joint to ensure proper bonding. After you've filled any cracks, allow at least 24 hours for the polymeric sand to cure properly before moving on to sealing.

This curing period reinforces the integrity of your repairs and prepares your pavers for their next phase of protection. A well-prepped surface not only looks polished but also offers a reliable foundation upon which your sealant can work its magic against the elements.

With clean and repaired surfaces in place, you’ll be ready to apply sealant effectively to protect against future wear and tear.

Surface Preparation and Sealer Application

The restoration process begins with thorough surface preparation, which not only enhances the visual appeal of your pavers but also ensures lasting durability. First and foremost, after cleaning, you must address any gaps between the pavers by re-sanding the joints. This is critical because without sufficient sand filling, the structural integrity can be compromised.

You’ll want to make sure to use polymeric sand, as it possesses unique properties that aid in stabilizing the joints over time. When spread into the joints, it's important to give this sand a good day or two to set and cure properly. The more time you allow for curing, the better stabilized your pavers will be, allowing them to withstand weather elements without shifting.

“Patience is key during this phase; rushing will only lead to future headaches.”

Once you've allowed ample time for the polymeric sand to settle, it's time for the next crucial step: applying the sealer.

Applying Sealer

The choice of sealant significantly impacts not just the appearance but also how long your pavers will hold up against environmental factors such as moisture and UV rays. There are primarily two types of sealers: solvent-based and water-based options.

Water-based sealers are generally regarded as being less toxic and environmentally friendly which aligns with our values at PHX Paver. They offer good penetration into the stones, ensuring breathability while delivering protection without altering your pavers' appearance. However, these types often require multiple coats, allowing adequate drying time in between layers, which may take more than one day based on humidity and temperature levels.

On the other hand, if time efficiency is paramount, solvent-based sealers provide quicker application due to their reduced dry times but may necessitate more frequent reapplication down the line—generally within 3-5 years due to wear caused by rain and sun exposure.

Navigating these choices can feel daunting but prioritizing eco-friendliness through water-based options usually yields reliable results while maintaining a cleaner environment.

As you commence applying sealant, remember that doing so under optimal conditions—temperatures above 35°F—will yield better results. It’s essential not just to coat indiscriminately but rather apply thoughtfully using a roller brush with an extension for even coverage across larger areas.

With careful attention to surface preparation and the right sealer choice, you are setting yourself up for long-term satisfaction in your paver restoration journey.

Maintenance for Long-lasting Results

Freshly restored pavers

Effective maintenance ensures the longevity of your paver restoration, allowing your hard work to shine through for years to come. When you maintain your pavers consistently, you're not just preserving their appearance; you're also extending their lifespan, ultimately saving you time and money in potential repairs down the line. After all, who wants to deal with the hassle of replacing worn-out or damaged pavers when a little upkeep can prevent that entirely?

Regular Cleaning

  • One simple yet essential task you can do is to sweep the surface weekly to remove debris. A clean surface not only looks great but prevents any unwanted growth, like moss or weeds, from taking hold.

  • Additionally, it’s wise to hose down your pavers monthly. This gentle wash helps prevent dirt buildup that can dull the beauty of your stone or brick.

  • Furthermore, conducting deep inspections quarterly enables you to look for signs of wear or damage early on. Catching little issues before they escalate is key; it's like visiting the doctor regularly for check-ups instead of waiting until you feel seriously ill.

Engaging periodic professional maintenance services is another excellent way to uphold your investment. Services like those offered by PHX Paver provide affordable maintenance packages tailored for busy homeowners who desire pristine outdoor spaces without the effort.

By establishing a consistent maintenance schedule, you’re addressing potential issues long before they evolve into significant problems that could cost you dearly. Neglecting necessary care means risking costly repairs and lowering your property value—a small amount of effort now can save you a lot later.

As we explore effective practices for ensuring your paved spaces remain in top shape, understanding these techniques will empower you to protect your investment and keep your outdoor areas inviting and vibrant. Let's consider how to achieve streamlined processes that enhance the restoration experience.

Tips for Efficient Restoration

Proper Planning is key to any successful project. To avoid unexpected delays, it’s smart to schedule your restoration during favorable weather. Ideally, late spring or early fall presents the best conditions: there are fewer rain interruptions, and temperatures are typically moderate.

This means that the cleaning process, drying times, and sealing can all occur seamlessly without the threat of rain ruining your efforts. Imagine investing time and money only for a sudden downpour to delay your progress or affect the integrity of your sealant—it's worth thinking ahead.

Another crucial aspect lies in using quality materials. Opting for high-quality cleaning agents, sand, and sealers can significantly impact the results of your restoration. Using products sourced from PHX Paver ensures you’re getting materials that offer better adherence and durability, thus reducing the frequency with which repairs need to be made in the future.

Investing in reliable supplies may mean a higher upfront cost, but it pays off by extending the life of your pavers. It’s like choosing an excellent foundation for your home; the better it is designed, the longer it lasts.

Clients who have chosen professional services often share revelatory experiences. One such satisfied customer noted, “The team at PHX Paver completed our driveway restoration in just four days, and it looks stunning!”

This speaks volumes about the benefits of hiring skilled professionals who understand both the science and artistry behind paver restoration.

Hiring experienced specialists saves time and guarantees that all aspects—cleaning, re-sanding, and sealing—are executed with precision. They also come equipped with the right tools to manage intricate tasks that a novice might overlook.

Additionally, be sure to factor in maintenance post-restoration; keeping your newly restored pavers spotless will ensure they remain in prime condition for years to come.

Last but not least, don't underestimate the importance of ongoing care after the restoration process is complete. Regular maintenance might include light cleaning sessions and inspections to catch any minor issues before they escalate into larger problems.

Always remember: preventative measures contribute significantly to ensuring longevity and beauty in your outdoor space.

Strategies for efficient restoration allow you not only to achieve a beautiful result but also to sustain it effectively over time. This commitment to care creates a lasting enhancement for your property.

Read More
Top