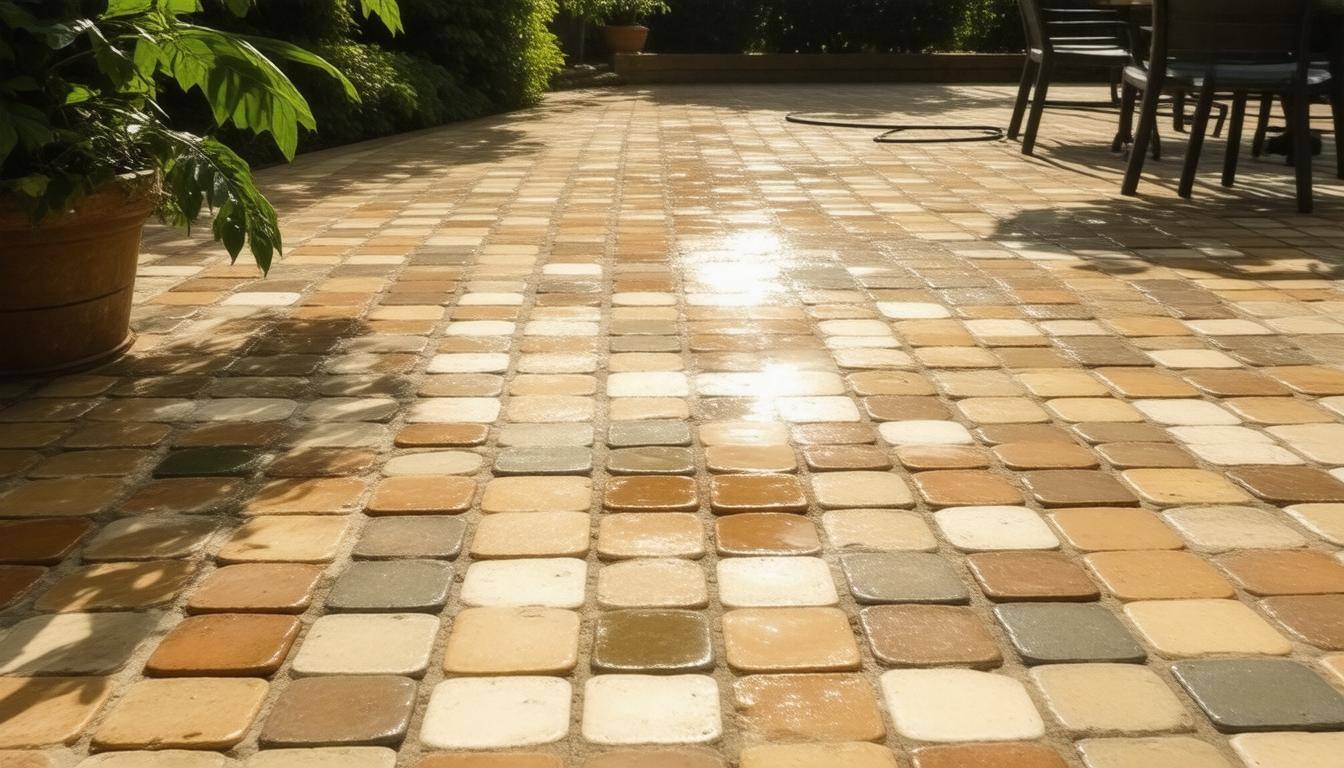
Cleaning pavers might not be at the top of your to-do list, but trust me, it should be! Before you shrug it off as just another chore, think about how much a clean patio can brighten up your outdoor space and boost its curb appeal. After putting in time and effort to install those beautiful pavers, maintaining them is essential for keeping your investment looking fresh and lasting longer. Whether you’re gearing up for a family gathering or just want to enjoy the sunny days, knowing how to clean and care for your pavers properly will make a significant difference. So, let’s dive into some effective methods and handy tips that will have your pavers looking like new again!
To clean pavers effectively, start by removing loose dirt and debris with a broom or manual scrub brush. For stubborn stains, use a mixture of water and mild detergent applied with a scrub brush; alternatively, natural solutions like vinegar can also be effective, but always test on a small area first. Regular maintenance such as sealing your pavers after cleaning is highly recommended to protect against future staining and weed growth.
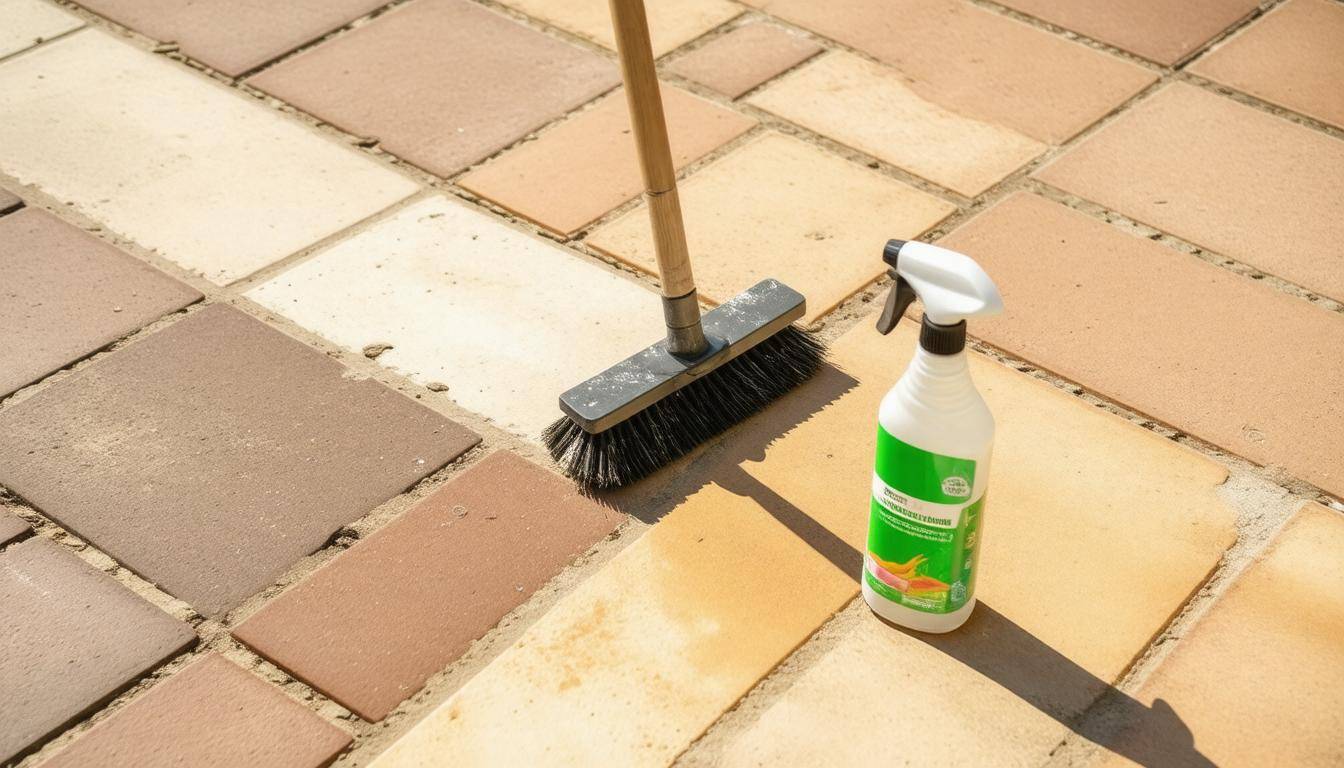
To begin with, let’s explore the tools that are quintessential for the job. Each one has its own strengths and serves a specific purpose in ensuring your pavers come out looking brand new.
A pressure washer stands out as an indispensable tool for deep cleaning pavers. Ranging between 1500 to 3000 PSI, it utilizes high-pressure water jets to dislodge stubborn dirt, grease, and moss from the surface effectively. This is particularly valuable for larger areas where scrubbing could be time-consuming and exhausting. It’s important to note that while these machines deliver impressive power, caution should be exercised to avoid damaging older or more delicate surfaces; adjusting the nozzle can help regulate pressure for different paver types.
An equally vital tool is a soft-bristle brush. While pressure washing does wonders, there will always be nooks and crannies requiring manual intervention. Using this brush ensures that you scrub with enough vigor to remove debris without scratching or harming the paver's finish. You'll find it especially handy in corners and areas where the vacuum of a pressure washer cannot reach.
A reliable garden hose complements these tools well; it serves as an excellent way to rinse off any residual cleaning mixtures before or after using harsher methods. Additionally, buckets and sponges are excellent for hand-applied cleaning solutions—particularly when dealing with spot treatments or localized stains.
Don’t underestimate the usefulness of a putty knife, which is fantastic for addressing concerns like excess grout or dirt buildup lodged in cracks between stones. Regular maintenance uses this handy tool to keep those grout lines clean and tidy.
Lastly, effective cleaning isn't just about what you’re working on but also ensuring your safety with protective gear. Investing in a good pair of gloves and goggles is wise since it shields you from any chemicals you may use during the cleaning process.
Now that we've discussed essential tools, let's shift our focus to the cleaning agents that will bring your efforts to fruition.
When it comes to cleaning agents, opting for products specifically designed for outdoor use makes all the difference in achieving optimal results without compromising environmental safety. A mild detergent serves as a universal solution suitable for general cleaning tasks, gentle enough not to harm your pavers while effectively cutting through grime.
For minor stains, a mixture of vinegar and water turns out to be surprisingly effective. This natural solution breaks down organic stains and works more conveniently than trying to scrub them away entirely. Just remember that too much acidity can damage certain types of stone, so it’s best applied cautiously.
If you're facing tougher stains that refuse to budge, then investing in a commercial paver cleaner might be your best bet. These specialized cleaners are formulated precisely for tackling tough stains such as oil or rust while preserving the integrity of your driveway or patio.
A beloved choice among environmentally conscious users is Simple Green, which provides a non-toxic formula effective at lifting years of dirt and grime without harming the surrounding environment—a necessity nowadays given the increasing preference for eco-friendly cleaning solutions.
Lastly, don’t overlook common household items such as baking soda, often forgotten yet exceptionally versatile when it comes to spot treatments on stubborn stains. With its slight abrasiveness, baking soda can help lift marks while remaining gentle enough not to scratch your beautiful pavers.
With each of these tools and agents at your disposal, you'll be well-equipped for a thorough paver cleaning session ahead. The next step involves ensuring those surfaces are correctly prepared before starting your revitalization process.
Proper preparation ensures effective cleaning and helps avoid damaging your pavers. The first step is to clear the area by removing any furniture, grills, or planters from the paver surface. This may seem straightforward, but it’s crucial as it not only grants you unrestricted access to the entire surface but also prevents any accidental damage during cleaning. Imagine accidentally bumping a heavy grill against your freshly cleaned pavers; that’s not a pleasant thought!
Once the space is cleared, sweeping thoroughly becomes your next task. Armed with a broom, start sweeping away debris such as leaves, dirt, or twigs. The point here isn’t just tidiness; removing this surface-level grime creates a clean canvas upon which your deeper cleaning efforts can shine. It also prevents these particles from scratching or otherwise damaging the paver surfaces during the following steps.
Following a thorough sweep, it’s time to inspect for weeds and grout issues. Take a close look at those pesky weeds growing between the pavers—trust me, they love to make their home there! You can choose to remove them manually or apply an anti-weed solution; either way, ensuring a clean seam will give your pavers longevity.
While you're at it, take the opportunity to inspect the grout lines as well. Cracks or damage in these areas can further compromise the structure of your patio over time. Utilizing a putty knife can be effective here—just gently scrape out any damaged grout and replace it where necessary to avoid staining during cleaning.
Regular inspection and maintenance of your pavers not only enhance their appearance but also prolong their lifespan—a win-win!
With your pavers prepped and ready, you're about to venture into advanced techniques that will truly rejuvenate your outdoor space, paving the way for transformative results.
A pressure washer is indeed one of the most effective tools for cleaning large areas of pavers. Its power enables it to reach deep into the crevices of paver surfaces, expelling dirt and debris in just a fraction of the time it would take manually. However, handling this powerful equipment requires some knowledge to ensure that your pavers remain unscathed throughout the cleaning process.
The first step is crucial: always start by setting your pressure washer to a medium pressure level. Too much pressure can cause noticeable damage; think of it as using a hammer when a soft touch is needed. You want to keep the nozzle approximately 12 to 18 inches from the surface and adjust it to a 30-degree angle. This angle allows you to clean effectively without risking etching or discoloring your beautiful pavers.
Next, use a detergent attachment for your pressure washer—this does wonders in loosening stubborn grime! Select a biodegradable cleaner specifically designed for outdoor surfaces, as this will break down dirt without troubling plants or pets nearby. Spray this solution generously over the pavers and let it sit for about 5 to 10 minutes. If you're feeling adventurous, take this moment to sip on coffee while the detergent works its magic!
Once that time has elapsed and you've enjoyed your brief coffee break, it's time to start washing. The key here is movement: maneuver the nozzle back and forth across the paver surface in gentle sweeping motions. If there are particularly stained areas, you might linger there for a moment, but don't forget to keep moving. This approach not only enhances cleanliness but also prevents any risk of damaging the surface.
Always remember that maintaining a distance between the nozzle and paver ensures that you’re protecting your investment while still achieving remarkable results.
After employing the pressure washer technique, keep in mind that some areas may benefit from additional attention through manual scrubbing. This extra layer of effort often proves essential in achieving a pristine finish, ensuring every corner is expertly addressed and free from hidden debris.
When it comes to areas that require more attention, using a scrubbing technique can be more effective than pressure washing alone. It’s all about making sure you’re using the right tools and solutions to get those pavers looking pristine. Begin by creating an effective cleaning solution tailored to your needs.
The first step in this process is straightforward: mix a mild detergent with warm water in a bucket. It's best to choose gentle soaps like Dawn or similar brands that won’t harm the joint sand between your pavers. If you're leaning towards natural options, you can create a mixture of one part vinegar to three parts water. This option not only serves as an effective cleaner but is also eco-friendly.
Remember, the right cleaning solution sets the foundation for your scrubbing efforts!
Once your cleaning solution is ready, it's time to roll up your sleeves and dive into some scrubbing. Grab a soft-bristle brush; it’s gentle enough not to damage delicate surfaces but firm enough to lift dirt effectively. Dip the brush into your bucket of soapy water and start applying it directly onto the pavers.
Use small circular motions as you scrub each paver’s surface, focusing on any stubborn stains or corners where dirt tends to accumulate. This technique not only cleans effectively but also prevents displacing sand from the joints, ensuring stability in your patio's structure.
A consistent approach is vital! Don’t rush through this step; instead, take your time, allowing the cleaning solution to penetrate the grime while you scrub away. If you find some areas are particularly dirty—like those infamous barbecue spill spots—apply a bit more pressure or let the solution sit for 5-10 minutes before scrubbing again.
After you've tackled most of the surface dirt, if stubborn stains remain, specialized treatments will be necessary to restore your pavers truly.
Never overlook the importance of regular maintenance. After scrubbing, make sure to rinse off any residual cleaning solution with clean water, ensuring no residue remains that could lead to discoloration over time. Aim for light cleaning every few months and a deeper clean annually.
Using a stiff-bristle brush can be helpful for textured surfaces, while a softer brush is great for delicate finishes or natural stone pavers. Choosing the right tool ensures that you won’t accidentally damage smaller or intricate details.
By investing time into this scrubbing method regularly, you'll maintain your pavers’ appearance and prolong their lifespan in your home.
With these foundational cleaning techniques in mind, we’ll now explore methods designed specifically for tackling those difficult-to-remove blemishes that might still cling stubbornly to your surfaces.

When you face persistent issues with your pavers, it’s essential to identify the type of stain you’re dealing with to apply the correct solution effectively. Some stains are more notorious than others: oil stains are among the most challenging, creating unsightly patches that detract from your outdoor space. Rust stains, caused by metal furniture or tools left on pavers, can also become ingrained over time, leading to stubborn discoloration. Finally, deep-set dirt can form from neglecting regular cleaning routines, making it harder to restore the beauty of your pavers.
For oil stains, the best approach is using a commercial paver cleaner specifically designed to break down oils. The process is simple: apply the cleaner directly onto the stain and let it sit for about 15 minutes. This waiting period allows the cleaner to penetrate the oil, effectively breaking it down before you scrub. Use a soft brush for scrubbing to avoid damaging the surface of your pavers. After scrubbing, rinse thoroughly with water to remove any residue; this step is crucial as leftover cleaner could affect future treatments or attract dirt.
If you’re facing rust stains, a paste made from baking soda and water can work wonders. Mix equal parts of each until it forms a thick paste. Apply this concoction directly onto the rusted area and leave it undisturbed for up to 24 hours. This duration allows it to penetrate deeply into the stain. Once the time is up, scrub gently with a non-abrasive tool and rinse well. If the stain persists after this treatment, don’t hesitate to reapply for better results.
When it comes to deep-set dirt, these stains can sometimes feel insurmountable. A heavier-duty cleaner like muriatic acid may be effective but should only be used as a last resort due to its potential dangers. Always adhere strictly to product instructions — proper dilution is key — and wear protective gear such as gloves and goggles during application. An alternative less aggressive route includes frequent pressure washing using your garden hose or renting a power washer if necessary.
| Type of Stain | Cleaning Agent | Application Time | Additional Tips |
|---|---|---|---|
| Oil | Commercial Cleaner | 15 minutes | Use a soft brush for scrubbing |
| Rust | Baking Soda Paste | 24 hours | Rinse thoroughly and reapply if needed |
| Deep Dirt | Muriatic Acid | Follow instructions | Always wear protective gear |
After tackling these stubborn stains effectively, maintaining your pavers' beauty and durability becomes vital. Taking proactive steps will ensure they continue looking pristine while preventing deeper issues down the road.
One of the most effective approaches to preserving the beauty and durability of your patio pavers is creating a regular maintenance routine that blends ease with efficiency.
For instance, sweeping frequently is critical; it may seem trivial, but removing leaves, dirt, and debris can prevent stains from taking root and becoming set over time.
Picture this: a simple act of sweeping can save your pavers from unsightly marks that could take hours of labor to remove later or even keep you from needlessly replacing costly sections.
Addressing spills immediately is another smart practice you can adopt, especially as we all know how some drinks can leave behind pesky stains if neglected longer than necessary. Think of red wine on beige pavers—it might ruin an outdoor evening if left unattended too long—prompt action will ensure those moments remain blissful.
In addition to immediate cleanups and routine sweeping, applying a sealer every two years is crucial for keeping your pavers in top shape.
When you apply a sealant, it acts as a protective layer against staining and weather damage while giving your surface a polished look. Many homeowners overlook this step, but sealant makes a world of difference in combating the effects of rain, snow, or harsh sunlight that can fade colors over time.
Remember to conduct regular inspections of your grout lines as well. These small spaces may seem insignificant, yet they play a vital role in overall stability.
Inspecting them for wear and tear allows you to catch issues early before they escalate into something more significant that requires full-blown repairs. If you spot cracks or shifts, addressing them promptly with grout repair ensures that any underlying problems are dealt with head-on instead of waiting for them to disrupt the entire area.
Consider reaching out for Phoenix Paver Sealing Service for professional assistance—they bring not only expertise but also advanced techniques for maintaining quality over time.
With diligence in these areas already established within your lifestyle, maintaining pristine pavers shouldn't feel overwhelming.
Regular inspections combined with effective cleaning practices have proven invaluable in enhancing the lifespan and appearance of your outdoor space. Embracing these habits will not only preserve your investment but also ensure healthy living conditions outdoors for years to come.
In summary, consistent care along with proper sealing techniques plays a pivotal role in extending the life and aesthetic appeal of your patio pavers. By adopting these maintenance tips, you contribute to the longevity and beauty of your outdoor environment.
PhxPaver.com © 2026 Powered by Pressure Power Pros | Service Areas